The Making of a Prop: The Voice Recorder
Added 2023-05-03 22:50:03 +0000 UTCHi Folks!
It's probably hard to imagine how much work goes into the detail of even some of the smallest props.
If you've seen our show "The Signal" you might have noticed a certain voice dictation crystal playing an important role in the story of the show. In this post I'm sharing a few WIP pictures of the crystal as well as the Blender file and the Arduino code in case you want to build your own.
We first started talking about the general shape and Cheetah said that he'd like something with facets but relatively simple in shape. Which is good because I'm not the best 3D modeler but this was something I could pull off.
Sometimes it's a bit tricky to get the right size for a prop in relation to our puppets, the stage and everything in between. So I modeled some simple placeholders and produced different sizes which we could look at during our rehearsals.

(Ignore the obvious problems in topology and the not so nice print, this was just to check the size)
We settled on the smaller size after testing it during one of our first rehearsals so I actually added two LEDs as place holders for the next rehearsal since I was still waiting on the resin.

With this we could test the light up effect during the rehearsal and get a first impression how it was to play the functionality during the dialogue. We originally planned for the hand pawpeteer of Honeyberry to trigger the effect whenever she uses her crystal for recording or playback but in the end settled on a button accessible to Tani who played Honeyberry. This way she could trigger it in sync with her voice line delivery.
So with the size settled and more information on how we want to handle it during the show I created the final shape that was used during the show.

You can see that the shape is even simpler to stand out more and that there is now space for the LEDs inside. Also this shape is now only one half of the crystal as I wanted to do a resin cast of it and use to halves to build a complete crystal.
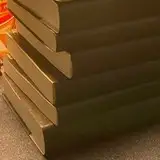
After a quick and easy 3D print of the model it was finally time to build a silicone mold. If you wonder if I did anything to smoothen the 3D print - no, I was actually counting on the lines of the 3D print to transfer to the cast and act as a kind of diffusor for the LEDs within (and it worked better than expected!). This was my first time ever trying something like this and I'm glad to say both the silicone form and the casting went really well!

Here you can see the prepared box for the silicone mold. I used a simple two component casting silicone I found on the big A website and filled the form. After waiting for the silicone to cure I peeled the 3D print out and luckily enough had a nice mold.
Then it went on to casting. The first cast had a few too many air bubbles but already my second attempt was much better. In total I did three casts of the form and used the last two to build the crystal you saw in the show. Unfortunately I can't find pictures of the single casts.
Now it was time to build the electronics which needed to fit in the crystal. As with many effects WS2812b LED strips to the rescue!

As you can see the crystal uses three LED strips soldered together with stiff wire so it keeps it's shape in the crystal housing.
With this soldered, I put it in the crystal and glued the two halves shut (after testing that LEDs work of course).

The rest of the electronics is quite simple, it's a generic Arduino Micro clone to control the LEDs with either the blinking pattern or in the "recording available" mode we needed for one scene. We had one twist though with the electronics and that was for when the crystal was worn by Honeyberry the power actually came from two small Lithium cells in the rods so that the addtional weight on the main puppet body was reduced. Runo designed some custom hand grips which hold the cells and routed the cable through the paw rods and then inside the arms to the neck where the crystal attached. For the scene where the crystal was just statically position on a desk we just attached it to a USB powerbank and called it a day.
In the attachements you'll find as promised the .blend file for the form of the crystal (you can probably print it with transparent filament if you don't want to cast it) and the code (nothing crazy, it was a quick "get things done" operation).
I hope you liked this peek behind the scenes for one of our props of "The Signal"
Cheers!
Lea