NOTE: As of the 2020 Winter update for CSP, Color Jitter is now a built in feature so this guide is outdated!! This method is still useful for making artificial jitter (specifically jitter that only uses certain colors) but otherwise check out my Brush Engine guide for more info on Color Jitter!
---
One of the best brush engine features in Photoshop and Procreate is something called Color Jitter. Simply put, Color Jitter allows you to make a brush that changes color as you use it. This is really useful for concept artists, landscape painters, or anyone who just wants to inject a little more color variety into their works.
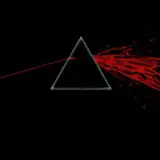
Here's a quick doodle I did using Color Jitter in Procreate:

Unfortunately, as of the time I'm writing this there is no Color Jitter function in Clip Studio Paint. This is one of the few things I've been really yearning for ever since I started using the program, but sadly I'm still left waiting years later.
Although there isn't any preset option for Color Jitter just yet, we can force CSP brushes to behave somewhat similarly with a little effort and know-how.
I attached a few of my Color Jitter brushes to this post for anyone just interested in giving them a try, but if you'd like to learn how to make them yourself for any of your personal painting brushes then keep reading!
To start, we need to cover a little background information regarding how Clip Studio Paint brushes work. If you haven't given it a read yet, I highly recommend checking out my Twitter thread on how to make a custom CSP brush with any tip, as it may make this explanation easier to follow.
The first thing to understand about CSP's brush engine is that it uses value to determine brush opacity. If you draw a brush tip in solid black, that means the brush tip will be at 100% opacity when applied to a brush. If you draw it in a lighter color, the brush will be more and more transparent the closer it gets to being white.
It"s worth noting that when a brush tip is imported at less than 100% opacity, CSP will use the Sub Drawing Color (the second of the two available drawing colors on your brush at any given time) to fill it in. So if your brush tip is at 50% opacity, the color will come out as a 50/50 mix of your Drawing Color and Sub Drawing Color.

When making a custom brush tip, CSP helps distinguish what brush tips are allowed to be turned any color via the color picker versus brush tips that are meant to stay one specific color no matter what by utilizing Expression Color.
If you can change the color of your brush through the color picker, that means your brush can use any color. In this case, you'll want to draw your brush tip on a Grayscale layer. (You can change the expression color settings of you layer by going to the Layer Property panel under the Window menu). Grayscale layers basically tell CSP that you want it to view the values as opacity rather than the colors they really are.
If your brush is unable to change colors (this is usually used for brushes that draw filled-in shapes like flowers or lace) then it utilizes a Color Layer instead, and CSP will treat it exactly how it's drawn.
Knowing this distinction is important if you want to make your own Jitter brush. By using a combination of Grayscale brush tips and Color brush tips, we can simulate Color Jitter so the brush will use your selected color while also adding in other additional colors.

These are a few of the brush tips I made for my brush. As you can see in the Layers panel, all of my black and white brush tips are set to Grayscale (the black and white squares over a circle) and all of my colored brush tips are set to Color. I tried to keep all of the colored tips roughly the same value so they didn't look too different.
Once I had them all drawn, I registered each tip as a brush tip and put them in my library (check the thread linked above for steps on how to do that). Then I duplicated one of my brushes so I could make a new one.

Once you're in the Brush Settings, you can add a brush tip to your brush by selecting Material and adding in the tips yuo just made. Make sure you add in several of the black and white tips for every one colored tip you add, so the brush still turns out looking like your drawing color.

These are the Stroke settings I used to achieve this look, but feel free to play around with the gap spacing or repeat method to find better results if you want.
After that, you're done! This workaround definitely isn't on the same level of polish as a genuine Color Jitter function would be and takes a little bit of effort to achieve, but if you're a fan of Color Jitter like I am and want something to temporarily fill the void until it gets (hopefully) implemented in the future, this should hold you over!
And feel free to customize them to your liking! If you like to keep your drawings to a limited color palette you can choose any colors you like for the brush tips. You can also adjust the opacity or gap spacing of the brush to depend on things like pen pressure or velocity. You can make all sorts of useful brushes with this method, like foliage that comes out in different colors or stampable books for shelves. They also work amazingly with Gradient Maps too 👀
Some swatches of my Color Jitter brushes attached below:

Thanks for reading!