In the previous article, we looked at the basics of how to set up a Delta Green game on Roll20.net, a virtual tabletop to play RPGs over the internet with your friends. Today, we'll be looking at set-up and best practices for presenting Delta Green adventures.
HOW TO CREATE PAGES AND HOW TO BRING YOUR PLAYERS TO THEM
In each Roll20 game, you can have many pages. Each one you create is a possible new play space that you can take the players to when you're ready and can contain nearly anything visual you want the players to see. Let's check out how to make a new page.
1. Click on the blue page tab in the upper middle-right of the screen.

2. Click on the blue + mark to Create a New Page.

When you create a new page, it will ask you to name it. You'll also see a whole bunch of settings like Dynamic Lighting and such, but we'll ignore those for now. Just add and name a new page.
When you want to switch players between pages, you come to this tab, select the red PLAYERS ribbon, and drag it to the page you want to switch the player's view to (this way, you might have many pages that either represent other operations, or various important locations in one operation).
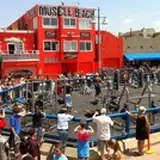
Usually, at the very least, you'll want a Landing Page. A Landing page is a place your players can be put so they see no clues or hints of the mission at hand on other pages. Think of it as a lobby you can put the players when you want to mess around on the important mission pages. A landing page can be as simple as black with a text title for the game, or it can be filled with an evocative image (that doesn't spill too many beans) taken from the operation, book, or campaign you are running.
Now that we have a page, let's look at layers.
THE THREE LAYERS OF EACH ROLL20 PAGE AND HOW TO NAVIGATE THEM
Now, drag any JPEG on top the Roll20 page, and it should import the image to the table top (make sure the image is relatively low-res, anything below 1mb or so works). Note, when this is imported, in addition to being on the virtual table top, it exists in your Library.

If you delete it on the VTT, it remains in the library, where you can grab it and drag it out on to the tabletop again.
Sorry for the aside; now, you have your image on the VTT. If you right-click it, you'll see a menu pop-up that looks like this:

Click Layer>>. This will show the three layers of the game:
If you select your image and clink on GM layer, you'll see it become slightly transparent (this means it's "hidden" from the players). To return it to the token layer, repeat the action but click token action.
Now that you understand how to sort and hide things on the board, let's look at how to set this up.
THE CLUE BOARD
Your mileage may vary, but for me, Delta Green is not a game about measuring precise distances to a target, moving characters 10 feet here, or 10 feet there, or really drilling down on line-of-sight. It's not tactical, it's more of an abstract and theatre of the mind experience for me. It's a game about poisonous secrets and interrelationships that occasionally (okay, maybe more than occasionally) explodes in violence.
As such, my Roll20 pages focus on a clue board. This is composed of a few things:
1. The Backdrop Image (on the map layer)
This can be as simple as the image of a cork board or a blackboard that fills the whole Roll20 playspace — an area to drop clues on. Or as complex as a custom "desktop" made specifically for each mission. Lots are available that have been made by talented Delta Green fans who have shared them around the internet. The key to the backdrop image is that it's evocative without looking like it has active data on it. (I found this one here.)

2. The Map (on the map layer)
Most often, I grab a google map of the area, since this is what most Delta Green would be seeing anyway.

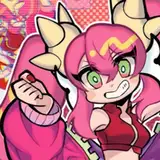
3. Agent Tokens (on the token layer)
This is usually a portrait of a player Agent tied to their character sheet (more about this later). It shows their current Hit Points and Sanity in bars above their heads as well as their names.

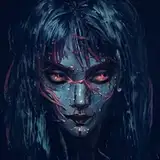
4. NPC Tokens (when in play, on the token layer, otherwise on the GM layer)
This is usually an image of a monster or NPC tied to their stat sheet (more on this later). When it's not in play, I hide these on the GM Layer. Note, I only name them when the players know what the target it named.

5. Photos, notes, and clues (when in play, on the token layer, otherwise on the GM layer)
These are usually important items, books, locations or ideas that the Agents are investigating. When they are discovered, I move them from the GM layer to the Token layer. If you double-click on any image you drop on the VTT, you'll note a GM Notes tab in the pop-up. Here, I usually write down important notes for me to remember as Handler for both NPCs as well as photo, notes and clues.

That's it for now! Next up:
Here's part 1 of this article series.
Drew Craker
2022-10-17 01:26:46 +0000 UTC