Hey Patrons! I'm right now in the last days of production to finish episode 26! As I start to get more and more colored panels, here is a commented work in progress of an ep26 panel from A to Z to show you the path I took this time:
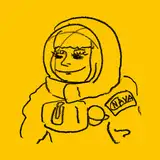
1. Storyboard
The storyboard was done at a thumbnail scale on paper with pencils. The perspective in my storyboards is often very flat and I manage only in it "what elements the panel has to show" because I try to solve storytelling problems. I was happy to use this time an additional blue pencil and yellow pencil on my storyboard process, it improved the readability of this small notes.

2. Sketching
After scanning the storyboard, in Krita and upscaling it to fit my page template, I redraw the panel with more work on the expression, anatomy and perspective (but freehand).

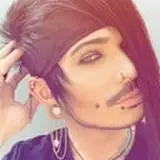
3. Character clean-up
I turn the sketch pass to bright blue and I redifine the drawing of the characters with a thin brush. It is like a lineart but I'm not focusing nor on closing all the shapes nor about the aliasing of the line; I just try to describe the shapes, draw them with more definition and I focus on perspective.

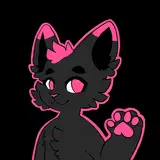
4. Preparing
I paint white for the silhouette of characters (to make them opaque) and then I paint the big mass of the landscape. I use three layers to split 'grounds'; I found it was easier for me to work with layer simply named "A", "B" "C" for the various grounds.

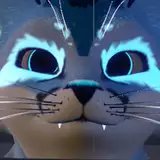
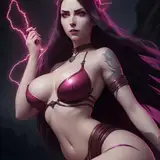
5. Shading (b&w)
I'm shading the artwork behind the lines previously drawn for the characters but quickly in the process I rarely resist to merge the line-art with the grey shading to "paint the shapes" and not be prisoner of working under the lines. Same goes for the approach of the background. This step really set the level of the final level of details.

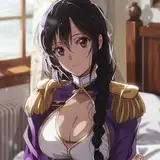
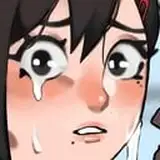
6. Recoloring
With brush presets using the HSY>Color blending mode, I'm recoloring the layers. The first pass of coloring feels often a bit metallic and grayish. Having perfect gray values to color conversion is near impossible, sometime I get lucky and everything falls right and sometime I have a lot of post-adjustment to do. But this step feels also good because all the details, volumes and shapes are already in place. The picture reveals itself very quickly with already the final level of detailing.

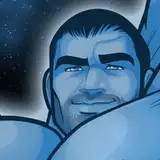
7. Final cleanup, Contrast and color adjustments
For the final step, I'm using brush with the blending mode overlay and filters like Color Balance and Color Curve to fix the metallic/grayish aspect.
My stack often ends with a collection of flat layers like a group of special effect on top with glow or rain, "characters", and a group for "backgrounds" with "A", "B" and "C" sub-layer: clean.

All in all, I'm happy with the first results I have because this work-flow offers advantages:
- The possibility to focus on the shapes and details with the black&white shading to fix anatomy and perspective.
- A good flexibility to edit details till the final step with paint-over.

The resulting line-art this way is painted and feels built-in the artwork. (and not layered on the top like a layer with black lines). It feels more organic. But I feel I'm still a bit rigid in the way I paint and my panels might feels very academic for episode 26. I feel I have to keep the same path for the future episodes but just explore how to be a bit more expressive for the brush stroke at step 5 (shading).
I hope you liked this workflow overview!
I'm back shading and coloring pages :)
Thank you for your support!
David Revoy
2018-07-25 12:12:09 +0000 UTCCJoe
2018-07-24 16:26:40 +0000 UTC