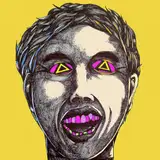
This time I used “Triangle” as the base, not the usual circle. This is not the “Triangle Method” because I didn’t used an inverted Triangle.
It’s like an improvised guide inspired by The Triangle and Loomis method. The triangle resembles an isosceles triangle that cover the top nose bridge (radix) down to the lower part of the lower lip (mentolabial sulcus).
Once the base is done, the placement of other features around it can be imagined easily.
I was able to use an accurate triangle that resembles the structure of mouth and nose due to the Golden Ratio tool as seen in one of the images.
#pogzart #art #drawing
2025-08-10 02:38:21 +0000 UTC
View Post
This is not yet the final drawing. A lot of changes happened after this, like coloring, adding background, and fixing the hand. The finished piece, sadly I can’t show it to you. But you can check out the Dawn of the Firebird, a Novel by Sarah Mughal.
2025-07-30 04:05:23 +0000 UTC
View Post
It helps guide you place facial features correctly. At the same time, allowing you to create something different from the reference. When you master loomis, even if you don’t have reference, you can still draw a face, and the bonus is, it’s a new character. Entirely made by you, from scratch. Doesn’t matter if it’s ugly or beautiful. Nothing is perfect. Looking at the mirror or observing people will give you this internal reflection that imperfection is part of an authentic world.
Not every drawing needs to look like Sung Jin Woo. Or barbie. Do not succumb to the same face syndrome. Try drawing nature, grass and rocks, anime, faces, and monsters.
#pogzart #art #drawing
2025-07-27 02:42:28 +0000 UTC
View Post
Been working on this character. I want to show you how I make the bird. I’m already in the coloring process.
I will show you soon the complete black and white manga style version.
2025-07-25 08:15:46 +0000 UTC
View Post
This is a depiction of a high elf lord (bigger than normal elves) who conquered four worlds. The four skulls represent the defeated kings decorated on her crown. You can see that the 4th skull has unusual features indicating that it’s not human.
Best hatching practice: use thin tip pen liners. I recommend sizes like .10 or .30.
Use smooth papers always.
2025-07-23 03:19:18 +0000 UTC
View Post
2025-07-20 12:11:05 +0000 UTC
View Post
I used crosshatching technique in trash polka red twist with the following materials:
Pentel graphgear 1000 0.5 4b lead
Rotring Isograph 0.3
Pentel Ted Permanent Marker
Rotring Eraser
Get access to my tutorials! Be a Sketchling! 🫡
2025-07-20 05:15:01 +0000 UTC
View Post
If you’re studying crosshatching seriously, timelapse videos are like compressed masterclasses — efficient and revealing.
2025-07-18 11:51:38 +0000 UTC
View Post
You can access my video tutorials for longer, and guided instructions.
2025-07-12 04:20:48 +0000 UTC
View Post
I don’t use guidelines when drawing monsters. Be sure to access my video tutorials to learn more about how to draw like this by heart! Thank you for your support! ❤️🫡
2025-07-11 08:37:22 +0000 UTC
View Post
By Pogzart
2025-07-10 06:18:58 +0000 UTC
View Post
✍️ (Advanced) Practice: Let’s Draw Female (Side Eye) – Part 4
By Pogzart
In Part 4, we apply the final polish and emotional refinement. This is where your portrait becomes a living character — not just a drawing. Through thoughtful value control, focused linework, and subtle details, we guide the viewer’s eye to the gaze, amplify the mood, and create a unified finish that feels elegant, clean, and intentional.
🎯 Objective
Finalize the portrait with expressive focus, light clarity, and subtle emotional storytelling through detail and edge control.
Develop:
Lighting consistency with soft and clear hatching
Facial expression nuance (especially in the eyes and mouth)
Edge softness vs crispness for visual hierarchy
Emotional tone guided by light, line, and contrast
🧱 Step-by-Step Final Refinement
Step 1: Reinforce the Gaze
Return to the eyes — ensure the irises are centered within the eye sockets and the eyelids frame the glance naturally.
Make the near eye slightly bolder in line weight, while softening the far eye for depth.
Add just enough highlight or hatch contrast to make the eyes the focal point of the portrait.
Step 2: Clean and Balance Light
Darken key shadows: under the nose, below the chin, beneath the cheekbone, and where the hair overlaps skin.
Softly build midtones with curved hatching — especially around the temples, jaw, and neck.
Avoid flat areas — even subtle planes (like the upper lip or neck curves) deserve light attention.
Step 3: Final Edge Control
Sharpen your important edges:
Soften and fade unimportant areas:
This balance creates depth and focus without over-rendering.
Step 4: Add Final Texture and Character Details
Light skin texture (pores, faint freckles, blush marks) can be added with delicate stippling or broken hatching.
Use line breaks in the lips, brows, and jawline for breathing space.
Optionally, add a collar, scarf, or simple tone in the background to support composition.
💡 Mood and Emotion Control
The angle + side eye = subtle emotion. This gaze can feel distant, shy, curious, or calm. Use expression support:
✔️ Tips:
Use minimal line to say more — each stroke should support form or feeling.
Avoid symmetry — a slight offset in brow, lip, or jaw brings life.
Use contrast to lead the viewer’s eye: don’t make every part equally sharp.
🎨 Stylization Guidelines
For semi-realistic anime:
Merge strong shapes with soft rendering — stylized clumps, realistic flow.
Clean form over clutter. Let simplicity bring clarity.
Use facial rhythm: eyes → nose → lips → jaw — your hatching and contrast should follow that path.
🧠 Optional Challenge Ideas
Create three alternate finishes with different moods (neutral, flirty, melancholic).
Add side lighting or backlight for a dramatic rim effect.
Try removing all outlines and finishing with only hatching and shape clarity.
🔁 Practice
Finish two versions of this same portrait with different hatching styles.
Review older side-view portraits — refine them using what you’ve learned.
Flip your drawing to check balance and focus.
This is your final pass — your last chance to speak through the drawing.
Every shadow, every edge, and every highlight carries emotion.
Don’t just finish it. Feel it.
– Pogzart
2025-07-08 19:45:10 +0000 UTC
View Post
✍️ (Advanced) Practice: Let’s Draw Female (Side Eye) – Part 3
By Pogzart
In Part 3, we complete the portrait by focusing on the hair, lighting, and overall polish — all while keeping the gaze clear and expressive. The challenge in this stage is maintaining the softness of the face while giving the hair enough volume, flow, and character to match the angle and mood. This part ties everything together through light, line, and final detail.
🎯 Objective
Complete the portrait with semi-realistic female hair that supports the sideways gaze, and unify the drawing with final value balance, hatching, and design clarity.
Strengthen your mastery of:
Hair structure over a turned head
Volume and clump flow from the crown
Hatching depth that matches light and emotion
Finishing lines and detail restraint
🧱 Step-by-Step Hair & Finish Flow
Step 1: Build the Hair Structure
Sketch the overall mass of the hairstyle — whether it’s flowing, tucked, pinned, or loose.
Keep in mind the head’s rotation: hair on the near side should have more volume and overlap.
Place the crown or parting clearly, and let hair follow gravity and curve naturally along the head.
Break it into large, flowing clumps, and taper the ends. Let some clumps overlap the face or neck gently.
Step 2: Render the Hair with Light Logic
Use curved hatching in the direction of the flow.
Leave open spaces for highlight bands where light hits the curve of the strands.
Layer your strokes where clumps stack or curve behind the ear or under other masses.
Add stray hairs or broken lines near the edges for texture and realism.
Step 3: Refine the Whole Portrait
Return to the face and deepen the key shadows — under the chin, behind the ear, beneath the cheekbone.
Clean up the jawline and neck, making sure the head’s rotation is clear through overlapping shapes.
Sharpen important edges like the eyes, lips, and upper hair clumps — soften unimportant ones.
If needed, add subtle texture (freckles, soft pores, light blush) to finish the skin.
💡 Hair and Head Integration Tips
Let the hair curve with the head — not float off it. Use the skull’s shape as a guide.
Side lighting? Drop soft shadows of hair onto the forehead or cheek.
Hair behind the ear should darken slightly to suggest depth and layering.
✔️ Tips:
Use soft pressure when hatching toward the face — don't overpower the features.
Avoid over-detailing every strand. Focus on shape and light.
Don’t forget negative space — clean shapes make the hair easier to read.
🎨 Stylization Guidelines
For semi-realistic anime:
Hair can have stylized highlights, but rooted in real flow.
Use larger clumps and cleaner shapes to keep it bold and readable.
Pair expressive gaze with subtle hair framing to enhance character.
🧠 Optional Challenge Ideas
Re-draw the same portrait with 2 different hairstyles: tied back vs loose.
Change the lighting direction to test highlight control on the hair.
Add a small accessory (hairpin, earring) and hatch it for realism.
🔁 Practice
Fill a page with hair clump studies viewed from ¾ angle.
Do 2 full versions of the portrait: one soft-light, one dramatic-light.
Time yourself: 30 min polish pass to simulate real finish speed.
This final phase is where subtlety and structure meet expression and style.
Let the gaze guide the portrait. Let the hair complete the form.
Draw not just what’s there — but how it feels.
– Pogzart
2025-07-08 19:24:59 +0000 UTC
View Post
✍️ (Intermediate) Practice: Let’s Draw Female (Side Eye) – Part 2
By Pogzart
In Part 2, we move from base construction into refining the face — with special focus on the side-glancing eyes. This phase is where we sculpt the features with clarity and emotion, anchoring the gaze, shaping the facial flow, and defining the form with clean lines and early shading.
🎯 Objective
Refine the semi-realistic female face with proper eye direction, soft anatomy, and balanced form — especially from an angled view.
Strengthen your understanding of:
Feature shaping in partial perspective
Gaze construction and eye structure
Feminine form through soft planes
Expression using subtle asymmetry
🧱 Step-by-Step Refinement
Step 1: Clean and Define the Eyes
Draw the near eye slightly larger, with clear upper lid curve and light crease. The pupil and iris must point sideways — not too far, or it will look unnatural.
The far eye is shortened — soften it with less detail, but keep it aligned with the eye line curve.
Make the irises slightly oval if needed, to follow the eye’s 3D shape. Add eyelash shape and waterline with minimal lines.
Step 2: Sculpt the Nose, Lips, and Brows
Nose: From this angle, the bridge might subtly silhouette, or one nostril might be more visible. Avoid outlining the whole nose — focus on side plane light and form.
Lips: Use volume — show the upper lip's curve as it wraps to the far side. The mouth’s corners will not be symmetrical.
Eyebrows: One should appear longer and sharper (closer to the viewer), the other softer and slightly curved back.
Step 3: Hatch Light and Volume
Begin building soft shadows:
💡 Expression and Direction Notes
Even in a neutral face, eye direction communicates. Keep eyelid tilt natural and matching the mood.
Make the iris slightly covered by the lid for more realism. Avoid full circles unless the eyes are wide open.
✔️ Tips:
Don’t over-outline. Let subtle shading and line weight carry the form.
Keep the far features lighter — you don’t want the portrait to look flattened.
Use breaks in the lash line and lips for a natural, breathing feel.
Reinforce the eye socket plane — it helps the gaze sit in space properly.
🎨 Stylization Guidelines
For semi-realistic anime:
Use clear, clean lashes and a soft gradient under the eye.
The side glance can be stylized slightly larger in the near eye, but keep structure consistent.
Let the mouth and eyes speak the emotion together — side-eye often implies curiosity, suspicion, or serenity.
🧠 Optional Challenge Ideas
Draw 3 expressions with the same side glance: calm, smirk, sad.
Try redrawing this angle with the head slightly more turned.
Hatch only one side of the face to emphasize lighting and turn.
🔁 Practice
Practice drawing just the eye pair from this angle 5 times.
Do mirror-flipped versions to improve consistency.
Sketch from reference to study real face angles and how form shifts subtly.
This is where the character begins to speak.
With just a glance, you control the story.
Draw the emotion through direction, and the form with care.
– Pogzart
2025-07-08 19:12:13 +0000 UTC
View Post
✍️ (Intermediate) Practice: Let’s Draw Female (Side Eye) – Part 1
By Pogzart
In this focused study, we begin a semi-realistic female portrait viewed slightly from the side, with the eyes looking to the side (not the head fully turned). This subtle pose adds complexity — you must understand facial structure in perspective while maintaining softness and rhythm in form. It's a great test of construction, placement, and visual storytelling.
🎯 Objective
Build a strong, soft-angled female head in semi-realistic style, with side-glancing eyes and proper proportion under slight turn.
Train these skills:
¾ or side-leaning head construction
Eye placement in partial perspective
Maintaining facial softness under form shifts
Anchoring the gaze with clarity and subtlety
🧱 Step-by-Step Construction
Step 1: Build the Turned Head Shape
Start with a sphere for the cranium.
Add a centerline that arcs vertically to show the head’s tilt and turn (¾ or side-lean direction).
Attach the jawline and chin with soft angles — not too sharp, keep the overall face form gentle and flowing.
Use curved guides for the eye line, brow, nose, mouth, and chin — all now slightly wrapping around the face due to the perspective.
Step 2: Place the Features in Angled View
Eyes: The near eye appears slightly larger; the far eye is shorter due to perspective. Tilt the gaze sideways — not the whole head, just the pupils and irises.
Nose: Slightly overlaps or silhouettes if the turn is strong. Keep the bridge aligned with the vertical curve of the face.
Lips: Foreshorten the corners — the far side curves earlier, while the near side shows more length.
Ear: Usually visible, but depends on the turn angle — place it from brow to nose level.
Step 3: Softly Indicate Facial Planes
Gently sketch the side of the forehead, the curve of the cheekbone, and the side plane of the jaw.
Keep transitions between planes smooth to maintain femininity.
Lightly mark the side contour of the nose and eye socket — not with hard lines, but with wrapping curves.
💡 Form & Perspective Tips
Use curved guidelines — never straight lines when drawing a turned face.
The eye line and features wrap around the form like rubber bands on a ball.
Don't flatten the side — show volume wrapping back toward the far cheek.
✔️ Tips:
Keep the near side more defined, and the far side soft and shortened.
Let the eyes glance subtly — don’t over-stretch the irises or you’ll lose realism.
Keep cheek and jaw transitions smooth but structured.
Light pressure is key — this is construction, not final lines.
🎨 Stylization Guidelines
For semi-realistic anime style:
Gaze direction is emotional — a side glance can feel shy, cautious, or calm.
Eyes may be slightly stylized, but sit correctly in the socket.
Use clean structure, avoid anime-style shortcuts like flat face sides.
🧠 Optional Challenge Ideas
Draw the same head turning both left and right.
Try the same angle with different expressions: calm vs confident.
Practice rotating the same head slightly — from front to ¾ to side — in sequence.
🔁 Practice
Sketch 3 female heads at different degrees of turn (¼, ¾, side).
Focus on the eye placement — keep the eyeballs consistent with head direction.
Ghost in the entire skull volume so the eyes don’t float or detach.
This is the start of subtlety.
Mastering partial head turns and glancing eyes makes your characters feel alive and aware.
Let structure wrap and gaze flow.
– Pogzart
2025-07-08 19:02:23 +0000 UTC
View Post
✍️ (Advanced) Practice: Let’s Draw Female (Semi-Realistic) – Part 4
By Pogzart
This final stage is about bringing your portrait to completion — polishing light, refining expression, and unifying all the elements you’ve constructed. It’s not just about finishing touches, but giving your character life, presence, and mood through careful value balance, final hatching, and edge control.
🎯 Objective
Refine and finish your female portrait with expressive polish, lighting clarity, and unified contrast.
Master:
Subtle expression refinement
Final value balance through hatching
Highlight placement and soft edges
Cohesive visual rhythm
Emotional tone through contrast and design choices
🧱 Step-by-Step Finalization
Step 1: Refine the Expression
Subtly adjust the eyebrows, eyelids, or mouth corners to solidify the emotion (soft, thoughtful, calm, intense).
Check symmetry, but let natural imperfections bring life.
Use gentle brow tilts, widened or lowered eyelids, and soft lip curves to say more with less.
Step 2: Adjust Shadows and Light
Darken key shadows: under the nose, under the chin, behind the ear, under the lower lip.
If needed, re-hatch cheeks, neck, or temple to sculpt smoother transitions.
Use light touch highlights — leave areas like forehead curve, nose bridge, and cheekbones clean or softly lit.
Control cast shadows from hair onto forehead or cheek for realism.
Step 3: Clean Edges and Line Flow
Reinforce silhouette lines around hair and jawline — make sure they feel soft, not stiff.
Fade unnecessary lines or blend hatching at outer edges (temples, neck) to draw focus to the center.
Unify hatching angles — keep consistent stroke direction in each facial plane.
Step 4: Add Optional Textures and Enhancements
Suggest skin texture with subtle dots, pores, or softness.
Add faint freckles, stubble, or light blemishes for character.
Slight clothing indication (collar, scarf, neckline) to frame the portrait.
Light background shading or fade to boost focus on the face.
💡 Mood and Character Unity
All rendering should serve the emotion — not just the anatomy.
Let lighting match the feeling: soft and upward for innocence, angled and sharp for intensity.
Every decision — line weight, shadow strength, highlight — should support the tone.
✔️ Tips:
Step back or zoom out often — check if the focus is clear.
Don’t over-darken the face — balance contrast throughout.
Avoid flat planes. Even gentle areas like cheeks should have subtle volume shifts.
Blend hair and face at the edges with care — avoid helmet effect.
🎨 Stylization Guidelines
For semi-realistic anime:
Use form-based stylization: soft structure, light exaggeration in eyes or lips.
Keep outlines clean but not rigid — blend where necessary.
Let highlights speak instead of relying on harsh contours.
🧠 Optional Challenge Ideas
Re-draw the portrait with a completely different mood just by changing hatching and shadow.
Add a second light source (rim light or bounce light) to increase visual interest.
Do a grayscale tone test — check if your contrast reads well from afar.
🔁 Practice
Finish at least 2 full female portraits using this 4-part approach.
Show your drawing to others and ask what emotion they read from it.
Time your polish pass — work in rounds: expression, light, edge, then final clarity.
Part 4 is not just about finishing — it’s about elevating.
Give your character clarity, personality, and emotion.
Draw with purpose. Refine with restraint. Finish with feeling.
– Pogzart
2025-07-08 18:45:33 +0000 UTC
View Post
✍️ (Intermediate to Advanced) Practice: Let’s Draw Female (Semi-Realistic) – Part 3
By Pogzart
In Part 3, we bring hair and form integration into focus — completing the female portrait by adding a hairstyle that flows with the head’s structure and enhances the overall character. This is where volume, rhythm, and stylization meet the solid anatomy you’ve already built.
🎯 Objective
Draw and render semi-realistic female hair that fits the portrait’s structure, personality, and light direction.
Refine mastery of:
Hair shape and silhouette over the skull
Clump logic and directional flow
Hair volume and stylized texture
Light logic across strands and layers
🧱 Step-by-Step Hair Construction
Step 1: Block Out the Hair Mass
Sketch the general shape of the hairstyle based on your character’s mood — soft and flowing, neat and sharp, or wild and loose.
Let the hair rise naturally from the scalp — place the crown or parting carefully.
Use long, curved lines to define the direction and mass. Don’t draw strands yet — think form first.
Step 2: Build Hair Clumps with Flow
Break the overall shape into major clumps using smooth S- or C-curves.
Hair should flow from root to tip — down the sides, over the shoulders, or around the face.
Taper the ends and vary the width of the clumps for a natural feel.
Let some strands frame the face and softly overlap the forehead, ear, or neck.
Step 3: Hatch the Hair with Light and Depth
Follow the flow direction when hatching each clump.
Shade darker near the roots and between overlapping layers.
Leave highlight bands along the hair’s curve to suggest shine (especially for straighter or wavy styles).
Add subtle flyaways or broken lines near the edges to soften the silhouette.
💡 Form and Integration Tips
Hair must sit on the skull — not float above it. Use the forehead and temples as anchors.
Allow light from the face to affect the hair — share shadows and edges.
Use fewer strokes for light hair, more layering for dark or dense styles.
✔️ Tips:
Don’t over-detail — focus on shape clarity before strands.
Make clumps curve around the head to keep volume believable.
For softer styles, avoid sharp corners in the silhouette.
Show gravity — where the hair falls, clumps compress or stretch depending on movement.
🎨 Stylization Guidelines
For semi-realistic anime:
Use bold, elegant shapes with refined inner texture.
Highlights can be graphic (broad curved bands) or softly built through hatching.
Avoid heavy outlines — use light contrast and shape clarity.
🧠 Optional Challenge Ideas
Draw 3 hairstyles on the same head: ponytail, loose wavy, tied bun.
Try drawing windblown hair with direction and tension.
Re-render the hair with reversed light to test your highlight logic.
🔁 Practice
Fill a sketch page with 3–5 clump flow studies from reference.
Practice connecting hair to the scalp correctly (fringe, crown, behind ear).
Redraw the portrait twice with completely different hair silhouettes.
This stage brings the gesture, style, and energy into your portrait.
Hair isn’t an accessory — it’s a flow of shape and shadow that breathes life into the character.
Let it move with form, light, and design.
– Pogzart
2025-07-08 18:28:47 +0000 UTC
View Post
✍️ (Intermediate) Practice: Let’s Draw Female (Semi-Realistic) – Part 2
By Pogzart
In Part 2, we bring structure to life by refining the facial features with subtle shapes, soft anatomy, and clean line rhythm. This phase is all about sculpting the face — giving it character, volume, and expression while maintaining semi-realistic stylization rooted in anatomy.
🎯 Objective
Develop the female face through refined linework, accurate features, and soft hatching that defines form and expression.
Reinforce understanding of:
Female facial proportions and balance
Refined feature construction (eyes, nose, lips)
Soft form-based rendering
Subtle stylization to enhance femininity
🧱 Step-by-Step Refinement
Step 1: Clean Up the Features
Eyes: Redraw with attention to the upper eyelid curve, lash line, and subtle crease. Keep the lower lid soft and less defined.
Nose: Simplify with light shading or line for the bridge. Emphasize the tip and nostrils with soft strokes, not harsh outlines.
Lips: Draw with a light center line. Shape the upper lip’s bow gently, and widen the lower lip for fullness.
Eyebrows: Use a clean arch with soft tapering. Placement should enhance expression and follow the brow bone gently.
Step 2: Define Facial Planes with Light Hatching
Add light hatching to build soft shadows under the brow, side of the nose, under the lips, and jawline.
Follow the form — your strokes should curve with the surface (not flat).
Focus on cheek volume, forehead curve, and subtle chin shadows.
Step 3: Adjust Proportion & Stylization
Slight asymmetry adds realism — adjust corners of the mouth, tilt of brows, or eyelid creases.
Clean lines should support volume, not flatten it.
Avoid excessive contrast at this stage — keep hatching soft and layered.
💡 Expression and Volume Notes
Keep the face slightly relaxed unless aiming for a specific emotion.
Feminine faces often benefit from less contrast, more form gradients.
Shape the light subtly — don’t over-darken unless you’ve locked your light source.
✔️ Tips:
Use minimal outlines and let shadow planes build the form.
Hatch under the cheekbone for a lifting effect.
Clean up the jawline and neck to prevent visual heaviness.
Highlight the eyes by reducing detail around them — make them the visual anchor.
🎨 Stylization Guidelines
For semi-realistic anime style:
Eyes may be slightly larger, but always seated correctly in the socket.
Nose can be soft — suggest it with tone, not lines.
Lips should be fuller and slightly stylized but grounded in real volume.
🧠 Optional Challenge Ideas
Create three emotional variations using the same base face: calm, smiling, sad.
Shade one side more heavily to simulate side lighting.
Refine the features with both soft and sharp tool options (pencil vs pen, soft brush vs hard edge).
🔁 Practice
Draw 3 different female faces from the same base shape with feature variation.
Isolate features: 5 eye studies, 3 noses, 4 lip shapes.
Practice hatching across curved forms using spheres and cheek shapes before applying to the portrait.
This is where your character starts to emerge.
Focus on flow, softness, and confident lines — draw like you're sculpting light.
The strength of this phase is in subtle control.
– Pogzart
2025-07-08 18:11:34 +0000 UTC
View Post
✍️ (Intermediate) Practice: Let’s Draw Female (Semi-Realistic) – Part 1
By Pogzart
Welcome to Part 1 of our female portrait session. This is where we build the foundation — a strong, proportional head using construction techniques tailored for semi-realistic anime-inspired female characters. You’ll learn to set up the skull, facial guides, and soft structural rhythms that define femininity while keeping everything grounded in form.
🎯 Objective
Construct a semi-realistic female face using proportion, rhythm, and anatomical balance as your guide.
Reinforce understanding of:
Female head structure and proportion
Facial landmark placement
Soft anatomy with clear form
Subtle stylization for a feminine feel
🧱 Step-by-Step Construction
Step 1: Build the Head Shape
Begin with a sphere and jaw shape — keep the jawline slightly softer and more tapered than the male version.
Add a vertical centerline to indicate head tilt and orientation.
Place the eye line across the middle, and divide the lower half into thirds for nose, lips, and chin placement.
Step 2: Place the Facial Features
Eyes: Centered on the horizontal eye line. Space between them should be one eye width.
Nose: Ends halfway between eye line and chin.
Lips: Sit about ⅓ between nose and chin, with soft corners and subtle bow shape.
Ears: Roughly between the brow line and the bottom of the nose.
Keep all placements gentle and natural — avoid sharp corners or harsh angles.
Step 3: Suggest Planes and Soft Forms
Define subtle cheekbone lines, forehead curves, and a narrower side plane than with male faces.
Hint at the brow ridge, but soften it — female foreheads flow more smoothly into the nose bridge.
Use curved guides for the lips, eye socket, and cheek lines to suggest fullness.
💡 Construction & Style Tips
Use softer angles and flowing lines to express femininity without over-stylizing.
Keep the base symmetrical and balanced, but don’t force perfection — slight natural offsets help realism.
Maintain head volume. Avoid flattening the skull or making the chin too sharp.
✔️ Tips:
Sketch loosely at first — this phase is about getting structure right, not adding detail.
Lightly ghost in your features before committing to any outlines.
Keep the jaw soft but defined — not round like a child, and not sharp like a masculine cut.
🎨 Stylization Guidelines
For semi-realistic anime:
Use slightly larger eyes with open lids and clean lashes, but keep the socket and brow placement grounded.
Simplify nose and lips — clean structure, not heavy detail.
Avoid hard anime lines or sharp cheek cuts — think “sculpted with light.”
🧠 Optional Challenge Ideas
Draw the same head construction facing front and ¾ view.
Try a younger and older variation using the same structure but with subtle shape shifts.
Lightly rotate the head up or down to test how proportions bend in perspective.
🔁 Practice
Sketch 3–5 female head bases from different angles using the same method.
Try building the head without using reference once you've practiced with it.
Use mirror flipping (digital or traditional) to check balance and symmetry.
Part 1 is your blueprint — solid, clean, and full of potential.
Keep it light, soft, and focused on flow.
The face you’re building will soon come to life.
– Pogzart
2025-07-08 17:57:08 +0000 UTC
View Post
✍️ (Advanced) Practice: Let’s Draw Male (Semi-Realistic) – Part 4
By Pogzart
In Part 4, we focus on the final polish and expression, transforming your portrait from a structured study into a finished character. This is where subtle choices in line, texture, and value bring emotion and personality to the surface. It’s no longer just a drawing — it’s a presence.
🎯 Objective
Refine the portrait’s expression, lighting, and balance, and apply final passes of cleanup, detail, and character identity.
Refine mastery of:
Emotional expression through subtle adjustments
Final lighting balance and cast shadows
Edge control and silhouette clean-up
Highlight vs hatch rendering rhythm
Drawing decisions that suggest mood and story
🧱 Step-by-Step Final Polish
Step 1: Refine the Expression
Slightly adjust the eyebrows, lids, or lip corners to reflect emotion — calm, confident, intense, or distant.
Make the expression fit the hairstyle and overall silhouette — everything should feel cohesive.
Use subtle creases or shifts in direction to guide the viewer’s read of the character.
Step 2: Final Lighting Control
Darken your core shadows one last time — under the jaw, nose, brows, and neck.
Introduce a few soft cast shadows (e.g., hair over forehead, nose onto cheek) for realism.
Highlight touches: sparingly lift light zones like the bridge of the nose, brow ridge, and upper cheekbone.
Step 3: Edge and Contrast Control
Clean any unfinished edges or stray sketch lines — especially around the outer face and neck.
Reinforce important silhouette areas (jawline, fringe edge, ear outline).
Softly fade some less important areas (like the far cheek or neckline) for a more natural depth.
Step 4: Add Final Texture or Mood Elements
Light skin texture (e.g., light stubble, pore dots, subtle aging) adds realism.
Optional elements: faint scars, freckles, asymmetry in eyebrows or jaw, or light clothing hints.
You can also tone the background with hatching or gray values to frame the character.
💡 Mood and Style Check
Ask: Does the portrait feel alive?
Are the values balanced across the form?
Does the lighting match the emotion?
Is the hair integrated cleanly into the head?
✔️ Tips:
Use restraint. Don’t over-render — leave breathing space.
Focus contrast where you want the eye to go: usually the eyes, nose, or fringe.
Avoid making everything sharp — blend edges naturally where light wraps.
Use varied hatch spacing to add texture without clutter.
🎨 Stylization Guidelines
For semi-realistic anime:
Highlight graphic decisions: sharp shadows and flowing lines work together.
Let simplification serve expression — detail only where it strengthens emotion.
Use strong light shapes and clean silhouettes over excessive detail.
🧠 Optional Challenge Ideas
Re-draw the final portrait with a different emotional tone.
Add a second light source or rim light for challenge.
Build a small cast shadow from the nose or bangs and observe how it affects the form.
🔁 Practice
Complete 2 full portraits using the 4-part process.
Show your drawing to others and ask what emotion they read.
Try doing the polish phase using only a soft pencil or one brush for digital.
Part 4 is where the technical becomes emotional.
Where line, shadow, and form merge into a personality.
It’s not just how it looks — it’s how it feels.
Draw with confidence. Finish with purpose.
– Pogzart
2025-07-08 17:41:02 +0000 UTC
View Post
✍️ (Intermediate to Advanced) Practice: Let’s Draw Male (Semi-Realistic) – Part 3
By Pogzart
In Part 3 of the male semi-realistic portrait, we complete the character by focusing on hair rendering, final hatching polish, and emotional clarity. You’ve built the structure, shaped the features, and formed the light — now it’s time to add the final visual voice: hair, character detail, and confident finish lines.
🎯 Objective
Finalize the portrait with expressive hair, balanced values, and refined line control. This session emphasizes character design, not just technical rendering.
Refine mastery of:
Male hair structure and flow
Hair-to-head connection
Integrated facial shadows and light consistency
Clean hatching balance for mood and design
Personality through subtle shape and texture choices
🧱 Step-by-Step Completion
Step 1: Construct and Place the Hair
Sketch the hairstyle based on the character’s tone — clean, rugged, youthful, mature.
Use root-to-tip clump logic: start from the crown or part line, and draw long, smooth clumps for straight hair, or S-curves for wavy.
Frame the forehead, sideburns, and nape with purposeful shapes.
Keep the silhouette readable from a distance — don’t over-clutter the outer edge.
Step 2: Hatch and Shade the Hair for Volume
Use parallel strokes following the hair’s direction to build depth.
Layer hatching in the shadowed clumps while leaving highlight zones untouched.
Add stray hairs and soft edge breaks for realism.
Create light flow across the hair: crown highlight, mid-tone sides, darker base near the skull.
Step 3: Final Touches on the Face and Neck
Deepen shadow areas with a second hatching pass (under chin, nose bridge, cheekbone base).
Reinforce the darkest accents — pupils, inner nostrils, underlip cast shadow.
Lightly hatch the neck and clavicle to anchor the head and suggest gesture.
Optional: Add subtle textures — moles, stubble, wrinkles — to push realism and identity.
💡 Hair and Form Integration
Hair must feel attached — avoid floating wigs.
Let some hair overlap the forehead or ears to blend the planes.
Match hair shading strength to the face — unify light logic.
✔️ Tips:
Use your brush or pencil pressure to separate light clumps from heavy ones.
Draw fewer, stronger clumps rather than many weak lines.
Keep the portrait’s focus where you want the viewer’s eye (usually eyes and hairline).
The final stage is more about clarity and restraint than over-detailing.
🎨 Stylization Guidelines
For semi-realistic anime style:
Use graphic contrast in the hair (hard shadows, clean lights).
Let hatching flow into the facial planes naturally — avoid artificial stops.
Add stylized edges to hair tips or eyebrows to match the design language.
🧠 Optional Challenge Ideas
Complete the same portrait in two moods: calm vs intense (just with hatching and line weight).
Change the hairstyle entirely — keep the face, but redesign the character.
Finish with limited values (light, mid, dark only) for graphic impact.
🔁 Practice
Redraw just the hair on 3 different head shapes.
Finish 2 full male portraits from scratch using the 3-part workflow.
Try different lighting angles and see how they affect the final shadows.
Part 3 is your signature.
It’s where structure becomes personality, and lines become presence.
Take everything you’ve learned — and finish with clarity, strength, and style.
– Pogzart
2025-07-08 17:23:22 +0000 UTC
View Post
✍️ (Intermediate) Practice: Let’s Draw Male (Semi-Realistic) – Part 2
By Pogzart
Now that the structure is in place, it’s time to bring the portrait to life. In Part 2, we refine the features, apply form-based shading, and begin light hatching to define depth, expression, and mood. This is where stylization meets realism — where your lines gain direction, weight, and voice.
🎯 Objective
Refine the male portrait with detail, light hatching, and form-aware rendering in a semi-realistic style.
Reinforce understanding of:
Refined anatomy for male features
Feature detailing and variation
Volume and plane-based shading
Controlled hatching and light logic
Facial expression and character presence
🧱 Step-by-Step Refinement
Step 1: Finalize the Features
Start with the eyes — clean up the structure and define eyelids, upper lash line, and subtle creases.
Sharpen the nose form — focus on the ball, bridge, and shadow under the nostrils.
Draw the lips with slight asymmetry for naturalism — remember male lips are often flatter and less sharp.
Tighten jawline, refine ears, and reinforce the cheekbone planes with clean, confident lines.
Step 2: Add Light and Form with Hatching
Choose a light direction (e.g., top-left).
Begin hatching with light, curved strokes along the forehead, under the brow, nose side, beneath the lips, and jawline.
Use contour hatching — follow the shape of the form, not flat cross-strokes.
Darken shadow areas with layered or crosshatched passes for weight.
Step 3: Express with Line Variation and Subtle Texture
Use thicker lines where form recedes or shadows deepen (e.g., under chin or nose).
Thin out your linework where the light hits directly.
Add skin texture hints — subtle lines under eyes, nose bridge, or around lips.
Suggest expression with gentle furrow lines, brow tilt, or slight lip curve.
💡 Form and Light Integration
Think in 3D — every line should support the head’s volume.
Don’t shade everything — let white space suggest light.
Hatch to blend form transitions (cheek to jaw, brow to forehead).
Avoid outlining features heavily — rely on value contrast and shadow.
✔️ Tips:
Hatching isn’t texture — it’s form language. Use it to sculpt, not scribble.
Eyes should feel inset, with shadows under brow and around the socket.
The nose and chin should “pop” with clear light-shadow planes.
Keep symmetry balanced, but not stiff — let one side be slightly different for life.
🎨 Stylization Guidelines
For semi-realistic anime:
Keep forms clean but expressive — it’s okay to simplify details like pores or hairline.
Let the hatching suggest softness or sharpness depending on the character’s mood.
Use line control for style — not all realism needs high detail.
🧠 Optional Challenge Ideas
Try different moods with the same face: calm, intense, tired.
Redraw with reversed lighting (light from below or side).
Sketch the same portrait with harder vs softer line emphasis.
🔁 Practice
Hatch over a blank face sketch with different lighting angles.
Redraw one facial feature (e.g., just eyes or lips) 5 times for refinement.
Practice building form with hatching only — no blending or smudging.
Part 2 is where your drawing breathes.
Let the structure speak, but now bring it character, mood, and form with every stroke.
Draw with rhythm, shape with intent, and hatch with meaning.
– Pogzart
2025-07-08 17:11:34 +0000 UTC
View Post
✍️ (Intermediate) Practice: Let’s Draw Male (Semi-Realistic) – Part 1
By Pogzart
This is where construction meets character. In Part 1 of this portrait session, we begin drawing a male face from the ground up in semi-realistic style, using structure, rhythm, and hatching to form the base of a believable head. It’s all about proportion, placement, and preparing the canvas for detail and personality.
🎯 Objective
Build a semi-realistic male face with accurate construction, strong form, and controlled linework.
Reinforce understanding of:
Male head proportions
Feature placement (eyes, nose, lips, ears)
Skull-based construction
Semi-realistic stylization with subtle anatomy
Preparing the form for future hatching and volume
🧱 Step-by-Step Process
Step 1: Construct the Head Shape
Start with a ball and jaw structure — use a centerline to orient the face and guide symmetry.
Add the eye line, brow line, nose line, lips, and chin using the classic thirds approach.
Indicate the side plane of the head with a vertical oval or curve to establish 3D space.
Step 2: Place the Features Accurately
Eyes go halfway between the top and bottom of the head.
Nose lands about halfway between eyes and chin.
Lips fall roughly one-third between nose and chin.
Ears align with the brow and base of the nose.
Focus on angular shapes and solid structure for a masculine feel.
Step 3: Refine the Planes
Start indicating the forehead slope, cheekbone ridge, and jaw angle.
Use boxy forms or simple shading to show structure.
Subtly emphasize the brow ridge and deeper eye sockets for male traits.
💡 Style Notes
Semi-realistic doesn’t mean copying reality — it means grounding your stylization in believable anatomy.
Simplify where needed (nose bridge, lip line), but make sure the structure feels dimensional.
Leave room for hatching in future stages — avoid heavy lines early on.
✔️ Tips:
Keep your lines light and purposeful — this is the skeleton of the portrait.
Don't detail too early. Lock in proportions first.
Male faces benefit from stronger angles and less curve-based softness compared to female faces.
Use overlapping lines to indicate subtle planes and build depth gradually.
🎨 Stylization Guidelines
For semi-realistic anime:
Stylize eyes slightly, but ground their placement and form in 3D.
Avoid hard black outlines — favor construction-based sketching.
Add subtle indications of skin folds, shadows, and depth with light line pressure.
🧠 Optional Challenge Ideas
Turn this portrait at a slight tilt to test construction under perspective.
Try two variations: younger vs older male face using the same base structure.
Start a female version with the same guides and compare form handling.
🔁 Practice
Sketch the male head from multiple angles using this construction method.
Redraw this base 3 times without looking — to memorize spacing and shape.
Use light hatching to block shadow under brow, nose, and chin.
This is your foundation — clean, solid, and ready to carry style and character.
Part 1 sets the tone for everything to follow — so take your time and build it strong.
– Pogzart
2025-07-08 08:11:37 +0000 UTC
View Post
✍️ (Master) Practice Session: Complete Your Character Portrait’s Hair
By Pogzart
At this stage, it’s time to bring it all together — structure, flow, texture, light, and personality. Hair isn’t just decoration; it supports the head’s form, enhances the face, and adds energy or mood. In this master-level session, you’ll focus on finishing your character portrait with fully realized hair — no shortcuts, no guesswork.
🎯 Objective
Refine and complete a full head of hair for your character, integrating all learned principles into one cohesive, expressive design.
Reinforce mastery of:
Hair shape and volume based on head form
Flow direction and curl/wave/straight logic
Light source and highlight control
Controlled hatching for texture and depth
Stylization that supports anatomy and design
🧱 Step-by-Step Workflow
Step 1: Start with a Solid Foundation
Use a clean portrait sketch — full head and face with clear structure.
Lightly block out the hairline, crown, and general mass of the hair.
Ask yourself: Is the hairstyle part of the character’s identity? Calm? Wild? Noble? Unkempt?
Step 2: Plan and Build the Flow
Break the hairstyle into major clumps that follow the scalp and gravity.
Use flow lines to define root-to-tip direction.
S, C, or spiral curves should dominate depending on hair type (straight, wavy, curly).
Step 3: Define the Silhouette and Volume
Create an engaging outer shape — not too uniform or too chaotic.
Layer inner clumps to add thickness and believable form.
Let some clumps fall forward, tuck behind the ear, or curl naturally for movement.
Step 4: Add Detail with Hatching and Line Variation
Use contour-following hatching to build depth and light.
Darken roots and under-clumps to create form shadows.
Place highlights where curves catch the light — often across the crown, bangs, or upper waves.
Refine stray hairs, flyaways, and soft edge strokes to break mechanical shapes.
💡 Final Rendering Tips
For shiny hair, use bold highlight bands and tight contrast.
For matte hair, use softer transitions and diffuse values.
Always hatch with the flow — never against it.
Let the character’s personality shape the final touches.
✔️ Final Pass Checks:
Does the hair feel naturally attached to the head?
Is the volume balanced (not too flat, not too puffed)?
Are highlights and shadows consistent with your light source?
Are the lines clean, expressive, and controlled — not overworked?
🧠 Optional Master Challenges
Redraw the same character with 2 completely different hairstyles.
Light the hair from a dramatic angle (underlight, rim light, backlight).
Merge multiple hair types (e.g., curly top, straight sides) with flow logic.
Add accessories like clips, bands, or hoods — then work hair around them.
🔁 Practice
Complete a full hair pass on at least 3 character portraits this week.
Zoom in on problem areas (e.g., crown, temples, behind ears) and do focused studies.
Time yourself: 10 mins for silhouette, 15 mins for clumps, 20–30 mins for full rendering.
Use reference, then push it into your own stylized form.
Your hair drawing is no longer just practice — it’s performance.
Design, anatomy, flow, and expression must now move as one.
Finish strong. Let every line serve the character.
– Pogzart
2025-07-08 07:52:21 +0000 UTC
View Post
✍️ (Intermediate) Practice: Drawing Curly Hair (Male)
By Pogzart
Curly male hair is bold, expressive, and packed with texture. It adds volume, rhythm, and character to your design — but to draw it right, you need to understand form, direction, and grouping. This exercise will guide you through creating semi-realistic curly male hair, focusing on simplified structure, natural bounce, and strong silhouette.
🎯 Objective
Learn to draw curly male hair by breaking it down into sculpted volumes, flowing curls, and natural density.
Reinforce understanding of:
Curl grouping (C-curve & spiral logic)
Volume-building over the skull
Natural curl flow and silhouette
Controlled messiness for realism
🧱 Step-by-Step Construction
Step 1: Sketch the Head and Hairline
Start with the head shape and sketch the natural hairline — slightly uneven and tighter around the temples.
Place the hair origin point (crown or center of scalp) and decide the overall length (short, medium, long).
Step 2: Block the Hair Mass
Don’t draw curls right away. Instead, sketch the general mass of the hair like a rounded cloud or puff.
Lift the form above the scalp — curly hair has more volume than straight hair.
Keep the silhouette lively but intentional — not too spherical or too flat.
Step 3: Build Curl Clumps
Divide the mass into chunky, organic clumps using C- or S-shaped strokes.
Each clump should suggest a spiral or wave without over-detailing.
Overlap and interlock clumps for a dense, dimensional look — especially near the top and sides.
Let some curls flick out near the edges to keep the shape dynamic.
💡 Form and Curl Logic
Curls emerge from the scalp, spiral outward, and either hang, twist, or bounce depending on weight.
Short curls tend to coil tightly and form dome-like volume.
Use contrast in curve size — tighter near the scalp, looser on the outer layers.
✔️ Tips:
Don’t draw every curl — suggest groups and let the eye connect the flow.
Show depth by overlapping clumps and layering.
Use light flicks and tighter curls around the temples and nape.
Create balance: keep the front, sides, and back varied but unified.
🎨 Stylization Guidelines
In semi-realistic anime:
Use soft, broken curves for texture and form.
Keep the silhouette defined — readable from a distance.
Use light hatching within clumps to show shadow and depth.
Stylize outer curls with sharper flicks or simplified spirals for contrast.
🧠 Optional Challenge Ideas
Draw curly hair in different character types: calm, wild, clean-cut, rebellious.
Try afro-textured curls vs loose Mediterranean-style spirals.
Animate bounce and movement in three expressions or head angles.
🔁 Practice
Fill a sketch page with curly clump thumbnails — vary size and density.
Redraw the same male face with short curls, mid-length waves, and untamed volume.
Practice shading curls with light hatching to give them 3D form.
Use photo reference, then reinterpret with stylized clump logic.
Curly hair isn’t about chaos — it’s about controlled texture and expressive volume.
Let it twist with purpose, build form with confidence, and give your character a natural edge.
– Pogzart
2025-07-08 07:44:40 +0000 UTC
View Post
✍️ (Intermediate) Practice: Drawing Straight Hair (Male)
By Pogzart
Straight male hair is clean, versatile, and powerful in design. It can be sharp and styled or soft and natural — but either way, flow and structure are key. In this exercise, you’ll learn how to draw male straight hair in a semi-realistic anime style with strong clump logic, gravity-based flow, and clean silhouette control.
🎯 Objective
Learn to draw straight male hair by focusing on clump design, clean flow direction, and stylized simplicity.
Reinforce understanding of:
Directional root-to-tip structure
Simple clump breakdown
Clean silhouette and gravity logic
Line control for sharp or soft styling
🧱 Step-by-Step Construction
Step 1: Lay Out the Head and Hairline
Draw the head base and indicate a clear, masculine hairline — straight, M-shaped, or rounded, depending on character age and style.
Place the crown (growth origin), then determine if the hair is parted, center-swept, or messy.
Sketch the hairline with small flicks to show how the strands begin.
Step 2: Build Clean, Gravity-Following Clumps
Use long, straight or slightly curved lines to create clumps from root to tip.
Clumps should fall naturally from the crown and hug the skull.
Taper the ends and vary lengths for a more realistic look.
Allow subtle curve or direction change for personality (e.g., slightly upward ends or angled fringe).
Step 3: Define the Silhouette
Use strong, simplified clump shapes to create a bold silhouette.
Avoid spiky chaos — instead, focus on broad clumps and purposeful angles.
For short-to-medium hair, let the clumps cut across the forehead, dip near the ears, or angle at the nape of the neck.
💡 Form and Fall Logic
Hair should hug the head and fall naturally — think of cloth or ribbons draping.
Clumps often split slightly near the tip — especially if dry or styled.
Back and side hair should follow the curve of the skull, wrapping around with soft angles.
✔️ Tips:
Use smooth, confident strokes for clean clumps.
Avoid stiff straight lines — add gentle curves and flicked ends.
Vary the space between clumps — too even makes it feel flat.
Suggest volume by overlapping clumps slightly or adding short back layers.
🎨 Stylization Guidelines
For semi-realistic anime:
Combine sharp outer clumps with subtle inner texture.
Highlight bands can follow the curve of the crown or slide across the fringe.
Use thin hatching or negative space for shine on smoother styles.
Keep side clumps short and crisp for a more masculine cut.
🧠 Optional Challenge Ideas
Draw three styles of straight male hair:
Practice parting the hair in different places and following the new flow.
Sketch profiles to understand how straight hair wraps behind the ears and jaw.
🔁 Practice
Fill a page with 3–5 straight hair silhouettes — keep them clean and strong.
Practice shading clumps with parallel hatching to build subtle volume.
Redraw the same haircut from front, ¾, and side view.
Study real haircuts and simplify into clumps before adding detail.
Straight hair looks simple — but simplicity done with purpose is what makes it shine.
Structure each stroke, let the hair fall with logic, and keep the design sharp.
– Pogzart
2025-07-08 07:33:02 +0000 UTC
View Post
✍️ (Intermediate) Practice: Drawing Wavy Hair (Male)
By Pogzart
Wavy male hair strikes the perfect balance between structure and movement. It’s versatile — from laid-back and loose to sharp and styled. In this exercise, we’ll build male wavy hair using S-curve logic, clean clumps, and silhouette control — tailored for semi-realistic anime character design.
🎯 Objective
Learn to draw male wavy hair by mastering shape rhythm, weight, and simplified natural flow.
Reinforce understanding of:
Structured S-curve clumping
Flow around the head
Short-to-medium hair weight
Stylized realism in silhouette and line
🧱 Step-by-Step Construction
Step 1: Sketch the Head and Hairline
Lightly draw the head and indicate the hairline with slight irregularity (widow’s peak, subtle waves, or clean edge).
Decide the parting (center, side, or tousled) and mark the crown for flow reference.
Step 2: Build Wavy Clumps with S-Curves
Use soft S-curve shapes to construct clumps from root to tip.
Keep the waves broad and subtle — tighter than female styles but still flowing.
Taper the clumps near the ends, and let some overlap around the temples and back of the head.
Step 3: Shape the Silhouette
Define the outer shape — avoid making it too spiky or too round.
For short or medium cuts, let the clumps arc over the forehead, curl slightly upward at the sides, or break at the ends.
Keep the overall mass hugging the skull but with movement.
💡 Form and Flow
Wavy male hair often falls down and out slightly, not straight down.
Gravity, hair stiffness, and style choice will influence how the waves sit.
Sides may be tapered or fade into the scalp — suggest this with broken clumps.
✔️ Tips:
Use confident S-curves — don’t overdraw.
Start with large clump shapes, then add minor inner flow lines.
Vary wave strength — some tighter, some longer.
Don’t overcrowd the forehead; let some areas breathe.
🎨 Stylization Guidelines
In semi-realistic anime style:
Keep clumps sharp but not overly jagged.
Highlight bands can be short and curve across wave arcs.
Shadow areas should follow under or behind clumps — hatch lightly for volume.
🧠 Optional Challenge Ideas
Draw the same hairstyle clean vs wind-blown.
Try short wavy hair vs long shoulder-length male waves.
Practice side, front, and ¾ views with different wave directions.
🔁 Practice
Sketch 3 male head shapes with different wavy styles: clean part, tousled, and slicked-back.
Fill a page with S-curve clump thumbnails.
Practice layering clumps with light hatching for depth and bounce.
Use reference, then reinterpret the same hair in your stylized form.
Wavy male hair has attitude — it can be chill, classy, or wild depending on flow.
Find the rhythm, shape the volume, and let the waves speak personality.
– Pogzart
2025-07-08 07:22:06 +0000 UTC
View Post
✍️ (Intermediate) Practice: Drawing Curly Hair (Female)
By Pogzart
Curly hair is bold, bouncy, and full of energy. It adds a lot of personality and texture to your characters — but it’s also one of the trickiest types to draw. In this exercise, we’ll break down how to draw female curly hair in a semi-realistic anime style, focusing on flow, volume, and spiral logic without getting lost in chaotic lines.
🎯 Objective
Learn to draw curly female hair by understanding spiral flow, clump rhythm, and volume-building techniques.
Reinforce understanding of:
🧱 Step-by-Step Construction
Step 1: Start with the Head Base and Hairline
Sketch the head and mark the general silhouette of the curly hair.
Keep the crown visible and choose your parting (center, side, or scattered).
Lift the hair higher from the scalp — curls take up more space and bounce outward.
Step 2: Build Hair Mass Using Spiral Logic
Don’t draw individual curls randomly — group them into large, structured clumps.
Use C and S-shaped curves to form spiral-like ribbons.
Let clumps bounce out and down from the scalp like springy tubes, overlapping naturally.
Vary the size of each curl group — mix tight and loose spirals for realism.
Step 3: Add Volume and Layers
Curls layer over and behind each other, forming a soft rounded mass.
Avoid flatness — build outward from the skull like a growing sphere.
Use curve and overlap to show depth and density.
💡 Form Awareness
Think of curls as 3D coils — wrapping like ribbons in space.
The silhouette of curly hair is soft but chaotic. Let it puff, bounce, and break symmetry.
The tighter the curls, the rounder and denser the form.
✔️ Tips:
Don’t draw every single curl — suggest clusters and let the brain fill the rest.
Loosen some curls near the edge to add variety.
Use tighter curls near the crown, looser toward the tips.
Add stray spirals and mini flyaways for a natural, expressive look.
🎨 Stylization Guidelines
In semi-realistic anime:
Use clean, expressive lines for main clumps and subtle loops for detail.
Hatching should follow the curl direction, not flatten it.
Highlights should be broken into smaller reflective areas, not long bands.
Keep the flow readable even if the shape is complex.
🧠 Optional Challenge Ideas
Draw the same character with loose curls vs tight coils.
Try different curl types: natural afro curls, wavy ringlets, or frizzy wild curls.
Animate curl bounce in three poses (still, movement, flipped).
🔁 Practice
Sketch different curl clumps using S and C curves only.
Practice one full curly hairstyle with light hatching for depth.
Focus on drawing curl silhouettes first, then add inner structure.
Fill a page with overlapping curly strokes to develop muscle memory.
Curly hair is full of life. Don’t tame it too much — let it twist, bounce, and tell a story.
Suggest the spiral, feel the rhythm, and let your lines breathe.
– Pogzart
2025-07-08 07:13:52 +0000 UTC
View Post
✍️ (Intermediate) Practice: Drawing Straight Hair (Female)
By Pogzart
Straight hair is sleek, elegant, and deceptively simple. But drawing it well means mastering flow, gravity, and structure. In this exercise, we’ll break down how to draw female straight hair that looks natural, voluminous, and stylish — not stiff or flat.
🎯 Objective
Learn to draw straight female hair by focusing on natural fall, clump structure, and controlled flow.
Reinforce understanding of:
🧱 Step-by-Step Construction
Step 1: Sketch the Head and Hairline
Lightly draw the head and mark the parting (center, side, or zigzag).
Place the crown where hair starts growing and determine the natural fall direction.
Indicate a clean, soft hairline — use short upward flicks near the forehead and temples.
Step 2: Build the Major Hair Clumps
Straight hair doesn’t mean flat hair — divide it into gentle, long clumps.
Each clump should follow gravity with slight taper toward the ends.
Allow for soft curves (not rigid lines) and layer clumps slightly to create depth.
Let some strands fall in front of the shoulders, others behind for variety.
Step 3: Add Flow Lines and Edge Details
Use long, controlled strokes to show the direction from root to tip.
Keep your lines smooth and deliberate — avoid scratchy or overly textured lines.
Emphasize the outer silhouette and flow, not individual strands.
💡 Form and Volume
Straight hair still wraps around the skull — keep the top slightly raised for volume.
Use subtle curves to suggest bounce or weight, especially near the shoulders.
Split long strands slightly near the ends to avoid stiffness.
✔️ Tips:
Vary the spacing between clumps to break repetition.
Keep edges clean and flow-based — think of the hair as soft fabric.
Lightly cross some strands for a more natural, layered effect.
Suggest thickness by layering darker hatching near the roots or underneath.
🎨 Stylization Guidelines
For semi-realistic anime:
Use clean, flowing lines for the outer clumps.
Add highlight bands across the upper curve or side of the hair.
Shadows should taper smoothly and follow the hair’s direction.
🧠 Optional Challenge Ideas
Draw three straight hair types: short bob, medium layered, and long straight.
Try drawing the same hair blowing slightly, as if caught in a soft breeze.
Practice transitions: start with a realistic version, then simplify into anime style.
🔁 Practice
Fill a page with straight hair clumps from root to tip.
Sketch side and back views of straight hair styles.
Practice hatch shading only one side of a clump to create gentle depth.
Use photo references to trace the flow, then redraw freehand.
Straight hair is about control, balance, and rhythm.
Let your lines flow with intention — the elegance lies in its simplicity.
– Pogzart
2025-07-08 07:05:36 +0000 UTC
View Post
✍️ (Intermediate) Practice: Drawing Wavy Hair (Female)
By Pogzart
Wavy hair is the perfect balance between structure and flow — it’s soft, elegant, and dynamic. This exercise will guide you through building wavy female hair from the roots out, using clumps, curves, and form-based logic. It’s ideal for adding grace, movement, and personality to your characters in a semi-realistic anime style.
🎯 Objective
Learn to draw flowing, wavy female hair by focusing on shape rhythm, clump structure, and directional curves.
Reinforce understanding of:
Hair origin and flow
S-curve rhythm in clumps
Layered structure
Volume and silhouette
🧱 Step-by-Step Construction
Step 1: Start with the Head and Hairline
Sketch the basic head shape and mark the hairline.
Choose the parting (center, side, or messy) and place the origin point near the crown.
Visualize the hair flowing from the roots, not just sitting on the skull.
Step 2: Build Major Clumps Using S-Curves
Use long, flowing S-curve strokes to form the main hair clumps.
Let them start wide at the roots and taper near the ends.
Layer the clumps — wavy hair often stacks or overlaps.
Avoid chaotic zigzags — keep the curves elegant and soft.
Step 3: Add Layers and Volume
Draw additional layers behind the front clumps for depth.
Lift the top slightly from the scalp to show volume.
Let some clumps fall over the shoulders or curl inward to break symmetry.
💡 Form and Flow Awareness
Think of wavy hair like a ribbon wrapping through space.
Emphasize the rhythm — long waves, not tight spirals.
Make the silhouette interesting: not flat, not too puffy.
Clumps should flow downward but bounce slightly as they go.
✔️ Tips:
Use varied S-curve lengths to avoid repetition.
Thicker clumps at the top, thinner and lighter near the ends.
Keep the hair flow readable — simplify before detailing.
Add broken strands and small flyaways near edges for life.
🎨 Stylization Guidelines
For semi-realistic anime:
Define each clump with clean lines, but shade with soft hatching.
Use highlight bands to show shine across the wave curves.
Simplify background clumps and fade them softly into shadow.
🧠 Optional Challenge Ideas
Draw the same hairstyle with different head angles (front, ¾, profile).
Practice wavy hair blowing in the wind — exaggerate the flow.
Turn wavy clumps into a braid or twist to explore complexity.
🔁 Practice
Fill a page with wavy clump thumbnails — just flowing shapes.
Sketch 2–3 wavy hairstyles (long loose, half-tied, or side-swept).
Try light-to-dark hatching along a single wavy clump to render depth.
Use photo reference, then redraw it in stylized form.
Wavy hair tells a story — soft, flowing, alive.
Let your lines breathe, let the curves dance, and make the waves speak character.
– Pogzart
2025-07-08 06:58:34 +0000 UTC
View Post