Right, another long ass blogpost about making stuff. In this one, I talk a little about kit bashing.
For those of you that don't know what it is, Wiktionary defines it as "To create a new scale model using pieces from existing commercial kits."

Example of a kitbash for a "Dieselpunk" Spitfire model (source).
It's a practice that was originally used with plastic model kits (the building of which was a very popular hobby back when I was a kid), but the concept applies just as well to creating 3d scenes like I do for Light of my Life. I'm taking pieces from existing digital assets (props, clothes, vehicles, environments, textures, etc.), and I repurpose or modify them to fit whatever scene I'm trying to create.
I've been modifying existing assets for as long as I've been creating visuals with Daz for my Visual Novels, and I think it's a really useful skill to have if you're creating images using a tool like Daz3d.
It can be used to tweak the color of a piece of clothing or accessory to better match the rest of an outfit from another set, or change textures, so a silk scarf now looks like it's knitted wool for instance.
It can involve modifying models, or cutting off bits, so you could for example add robotic arms and legs to a photo copier (which I have on one occasion).
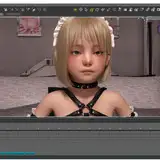
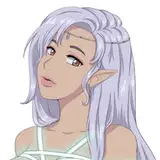
For the fellow Daz dabblers:It can also be very useful when you're trying to get assets created for a different generation of character model to fit properly. Macy and Denise are based off of the Genesis 8 character model, but there's a wealth of lovely outfits and props available for the older Genesis 3, and even older ones, and those are often not quite compatible and need tweaking to make them work.
Lets go over some examples of kitbashing using today's wallpaper.
The idea for a rocket sleigh wasn't entirely my own, I must admit. I ran across this neat looking 3d model on one of the sites I use to procure assets, but it was slightly too cartoonish looking, so I figured I might be able to cobble something together by myself.
My first prototype went for a steampunk look, and featured mostly parts I had laying about the place, either from bundles, or picked up for a few dimes during a sale. Some nice parts were ripped from models by an artist named Petipet, who does great future-retro models.

So, while doesn't look awful, it still needs a bit of work, because it doesn't look too airworthy. Even if it was useful in prototyping the composition for this wallpaper, I decided to ditch the steampunk feel and go for something a little more high-tech, with big articulated jet engines in the final version. And in this case, being able to put the wings on the front also works better in the composition.
Luckily, I had some bits for that lying about as well, and around this time a year, it wasn't hard to find another nice sleigh model with some more advanced textures that added a bit more feeling of substance, that also included a big bag of gifts which I was looking for anyway.

Here it is, and the models that donated some bits to put it together.
I can't say it's the best kitbash I've ever done. But since it is for a wallpaper, I couldn't put something really big and elaborate together, as it would have to fit on screen with Macy and Denise, but still let them be visible in good detail. Still, it serves its purpose of transforming a regular old sleigh into a weird flying contraption.
This comes pretty close to the traditional definition of kitbashing, as it's pulling bits from other kits to change that sleigh one into something distinctly different, and you could very well imagine you could do something like that with an actual plastic model kit.
For the fellow Daz dabblers: one of the most useful tools here is the use of Daz3d's geometry editor tool, a standard tool that lets you easily select and cut away any geometry you don't want, making it easy to, for example, rip a windshield from a Rover.
So with the main prop for this scene done, the next part is outfits.
Outfits are usually a lot more complex to modify extensively, and doing anything other than futzing around with the textures and shaders.
There's a lot of complex systems at work to make an outfit fit to a character, and adjust to that character's shape, including "following" morphs that follow the contours, systems for detecting collisions with the character model and smoothing those out so the outfit doesn't clip through or into the character, movement morphs you can apply to move the outfits (billowing skirts, states of undress, etc.), and helper morphs to help fit it over or under other pieces of garment (usually from the same set), or adjust for different body proportions.
And to make matters worse, when something with the clothes is off, it's immediately noticeable and very distracting, so if you can't get it to play nice, you're better off ditching that piece of clothing all together and go for something else.
Just the other day, I picked up a few legacy outfits from Aeon Soul, another one of my favorite artists, at a bargain, and I figured this was as good a time as any to see if I could use some of those. I love how their creations invoke that feeling of some of my favorite fantasy artists and illustrators (Frazetta and Jean Giraut a.k.a. Moebius are just two that spring to mind), and how they manage to accentuate the curves of the female figure with their outfits. In addition, their use of materials is top notch: the texture of the fabrics, fasteners, allotments, and ornamentation just feels substantial and rich.

This particular outfit has a distinct clinical/sci-fi look to it (and with the bonus textures for dirt and damage you could easily imagine it being worn by a nurse fighting her way out of a medical facility that has suffered a catastrophic containment breach), but some additional textures I picked up at the same time gives me something that looks suitably wintery, with some matching snow crusted boots to, er, boot.
I love how the miniskirt shows just enough booty to draw the eye and trigger the imagination, looking fashionable but without revealing too much and making it tacky, so I feel that's a great fit for Denise.
With the main item of clothing picked, we need to accessorize. Accessorizing lets you take a simple outfit and change it into something spectacular, but it can also help tone down a spectacular outfit with a very distinct character of its own (like this), and help it to fit in with the look you're going for.
I figured since it's holiday themed, we could have Denise play the part of Rudolph, so I added a brown leather jacket to get that white and brown reindeer color scheme.
Next, a suitably retro looking biker's helmet that I slightly retextured, with modified goggles to fit on the helmet to give it a pilot's vibe, and some antlers stuck on from an outfit I picked up during a giveaway a little while back.
To wrap up, we add some fur-trimmed gloves, a (retextured) wooly shawl, a tool belt, and a custom face paint job inspired by looking at some painting schemes online.

This is kitbashing too, even if we're not really fundamentally changing much. We're pulling in accessories and other bits of clothing from all kinds of other sets, and modifying them to fit in with the overall theme of the outfit, while adding some custom touches.
Done, right? Well, no. Unfortunately, lovely as the dress is, it comes from a time before dforce (a technology to run a simulation on the clothes to drape them realistically), and the movement morphs it ships with don't quite make it look like a natural drape on the front with Denise's pose, so we need to do some more work.

That looks a little crumpled.
Luckily, dforce can be applied to objects that don't ship with it, even if it does require some special TLC to make it behave and not crash spectacularly (see this earlier blogpost on dforce use).
For my fellow Daz dabblers: in this case, I'm applying a thing called a dforce modifier weight node to the dress, so I can specify how much the influence of the draping simulation should affect different parts of that dress. I use this to make sure only the bottom part is simulated, as the rest looks fine.

Now it looks much more natural
We'll have Macy be the Santa to Denise's reindeer. So again we start out with some beautiful creations by that same artist, since they'll match the style and tone of fashionable fantasy of Denise's outfit, and that gaudy fantasy look also fits with the Santa theme we want.

In this case, we're getting the skirt and top from one set, the bodice from another, and the boots from a third (that I've used in another wallpaper before). Picking some red and golden tones from the available textures is a start, but we're not there yet.
So next up is another legacy outfit I picked up for peanuts a good while back just for such an occasion, adding a hood with two long tails with pompoms on the end, that looks just like a fanciful Santa's hat, except it still needs some texturing work, as it doesn't come with suitable Santa color scheme out of the box, which would be red, white, and gold.
With a bit of PaintShop magic, it's not hard to change the hue of a light blue texture that comes with it (with some silvery ornamental embroidery on it), and change it to a lavish red.
Next, we change the shader on it to one that makes it look velvety.
So that leaves that silvery embroidery that's not all that clear to see on red. Luckily, while I'm messing about with the textures, I noticed there's an unused texture in there that was probably meant to add some displacement to the outfit (making it look like the embroidery sticks out a little from the fabric). With a bit of tweaking I was able repurpose that to add a layer of metallic flakes to that outfit, and by setting the roughness and the color just right, it does a great job of looking like gold-thread embroidery.

So, now it's time to pose Macy, but that's when we discover that the hood is one of those ones that has trouble with compatibility. Basically, the cape part of the hood doesn't follow Macy's upper body at all. It's just clipping through her arms, while seeming to float on the other side. That won't do.

So, again, this is where dforce comes to the rescue. Since the outfit looks fine when Macy's in her T-pose earlier (the standard arms-out pose that is the starting pose of Genesis characters), we'll start from there, and rely on the fabric draping simulation to make sure it fits Macy as we set the simulation to move her into her final pose when it runs. That also has the effect of draping the hood nicely over the clothing items she wears underneath, which saves me the trouble of having to fix clipping issues manually in postwork.
And while we're at it, we'll do the same dforce simulation for the skirt (that looks a little crumpled up), and the sleeves of the top (that stick out a little too much), so this is what we end up with.

I've also accessorized with some more goggles (from a different kit this time), a scarf (retextured), some earrings, and a steampunk-looking tablet that I modified to have a backlight and glowing vacuum tubes.
For the fellow Daz dabblers: I used the geometry editor to assign a new surface to the inside of the tube, and applied some emission shaders (with high illumination at a low temperature) to get that vacuum-tube-under-power look.
So that's all the hard parts done. Then all that's left to do is put it all together, add some snow effects, add a bit of clutter to the scene by adding a few snow piles, a radar dish to reinforce the takeoff theme, some crates, and a few light fixtures. Then it's time to light the scene and characters, and one new wallpaper's done.

Well, except for the bit where I create a NSFW version too, and figuring out the typesetting for the tittle in post work, and adding some effects to those letters, but we'll leave it here for now.
Naughty Road
2023-12-25 17:22:11 +0000 UTCJose Guerra
2023-12-24 16:48:51 +0000 UTCNaughty Road
2023-12-17 20:43:50 +0000 UTCAdamska
2023-12-17 20:40:52 +0000 UTCNaughty Road
2023-12-17 19:00:16 +0000 UTCStephen Gasaway
2023-12-17 18:17:43 +0000 UTCRich Spencer
2023-12-17 10:49:23 +0000 UTC