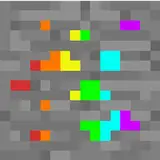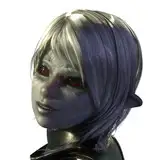
▼色決め、着色 色決め、着色に入ります。 ・1枚目 前回のモノクロの段階からグラデーションマップやレイヤー効果を使い、色を乗せていきます。今回のテーマカラーは「桃色」なので全体的にレッドとマゼンタ寄りの色合いでまとめました。 暖かさを出すように強めのイエローの太陽光を右上から乗せてます。 ・2枚目 この段階でイメージが大体決まったのでここから構図の調整や細かな部分を更に良く変更していきます。決まっている部分はどんどん描き込んでいきます。 ※なぜこのような変更をしたのか、詳しい部分はカブトムシプランのメイキングで改めて記事にします! -------------------------------------------------------------------------------------- 「Spring shade」color determination, coloring ▼ color determination, coloring ・1st sheet From the previous monochrome stage we will use the gradation map and the layer effect to put the color. Since the theme color of this time is "peach color", I made the color shaded to red and magenta overall. I'm putting a strong yellow sunlight from the upper right so as to get warmth. ・2nd Since the image was generally decided at this stage, I will change the composition adjustment and fine details better from here. The fixed part will draw more and more. ※For details on why we made such changes, I will revisit the article for making "beetle"! ※I am using google translation.
NOEYEBROW
2018-05-12 14:15:29 +0000 UTCむつみ
2018-05-12 13:57:19 +0000 UTC