How to make your own AI images using NovelAI
Added 2024-11-30 21:59:13 +0000 UTCI received good feedback from a lot of people for my images. Even though I generate them using AIs, most people can't do as well. So I thought about explaining how I produce the images used in Maze of Ambition, making a small tutorial of sorts.
First of, it's important to remember there are multiple types of generative AIs, and each one has different models. They are based on different technologies, trained on different data. It's important to understand what they are good for and how they work in order to make the most efficient use of them.
For Maze of Ambition, I use 2 different types:
Dall-e 3: A transformer-based AI designed for natural language processing. It understands the text in your prompt and converts it into ideas, and creates an image directly based on those ideas. It's good for smooth images that want to convey an idea efficiently. I use it for icons in Maze of Ambitions (status icons, items...) and sprites in other games.
NovelAI: A generative-based AI slowly transforming a starting canvas to fit more each idea in your prompt, based on probabilities, and iterating multiple times to get closer and closer to an accurate result. It's good for aesthetic images that want to show a picture before an idea. I use it for card arts and sprites in Maze of Ambition.
As you can see, each one has its own purpose. I'm mainly going to focus on detailing how I would make an image using NovelAI. This is a paid online service you can use here: https://novelai.net/image
Yeah it's a paid service. Unfortunately, if you want to make good images, and a lot of them, you don't have a lot of choice. If you have a good PC, there are alternatives to run models on your own device, but I'm not going to go over that.

To create an image, you need to input a prompt that describes your image. Remember I said NovelAI is tag-based. It has been trained on images that have tags that describe them, so it basically knows what each tag does to an image. Adding a tag to your prompt basically shifts the image towards the average training image using that tag. You could just describe your image using a sentence, but NovelAI would basically deconstruct your sentence into tags or tokens and work from there, so it's kind of not good for any accurate result.
You need to describe multiple things. Let's just break them down in categories: global composition, physical description, pose, background and details, style.
Let's use an example:
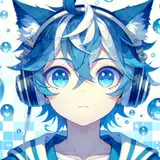
Global composition: 1girl, cowboy shot (giving information about the type of image we want, alongside how the character is positioned in the image)
Physical description: farm girl, blue hair, blue eyes, white hair, multicolored hair, big breasts, overalls, white shirt, undersized clothes (very descriptive, giving as many physical traits we want the character to show, including clothing)
Pose: looking at viewer, from the side, hand in own hair, floating hair, close-up (where the character is looking, where it is relative to the camera, how it is moving, how body parts interact)
Background and details: sunflowers, floating leaves, sunlight, wind, clouds, beautiful sky (includes other elements that should appear in the image)
Style: glow white particles, cinematic lighting (medium used, lighting, colors)
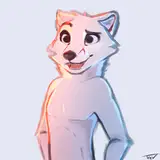
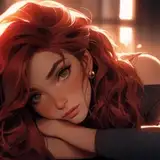
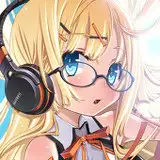
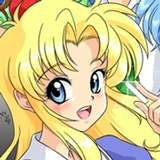
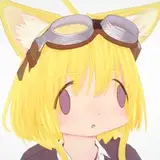
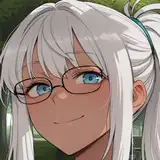
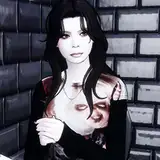
Using this prompt, we can get an image like this:

We can also set higher or lower importance to some tags. For instance, the sunflowers tag is a bit strong, so we could write [[[sunflowers]]] instead, maybe a bit less [wind] or a bit more {big breasts}. These adjust how much influence a tag has ({more influence} and [less influence]).
This is good, and it includes everything we asked for, but we can do better. Style is a bit generic, and maybe I want to have something similar but refine it a bit and adjust the style. This is where Vibe Transfer comes in.
Vibe Transfer allows you to use other images as a reference point for your image generation. It is really useful for adding style and refining images.
Do not use copyrighted images! Use copyright-free images or your own generations for Vibe transfer, as it directly copies the style of the image.
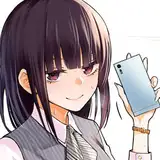
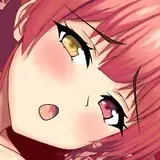
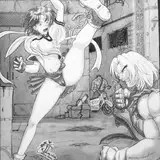
We can use the image we just generated, and put a high reference strength like 60% to keep most of the information and guarantee to get a similar image in terms of composition and character. I'm also going to add this painting of Monet with 30% strength for style and color, as well as a few tags to match: abstract, [[[[[[[purple sky]]]]]], watercolor, sunset
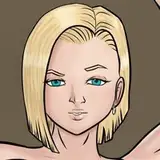
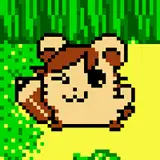
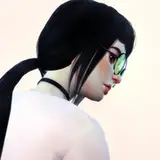
Here is the result I'm getting:

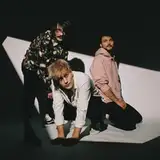
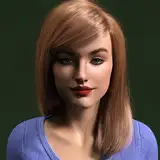
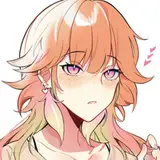
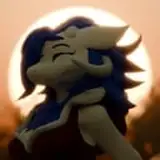
This is better, but we can do more. To refine the image, let's keep going, use it as vibe transfer alongside other copyright-free images or generations:

Here you go.
"But wait! I don't want to do a portrait. I want a big scene with my character in center, but when I try, the character looks so bad!"
Yeah, the issue with diffusion-based models is that they look at the image in a vacuum. On a big image, your character's eyes for instance are less than 0.1% of the image, so any small disruption will change them a lot, and it will only kinda look like eyes.
If you want a big image, but with intricate details, you first need to do the details in higher resolution, then incorporate them in the image. We're gonna try just that with out farmgirl right there. Let's make a larger image.
This image is currently 832x1216. Let's downsize it so it fits in a 1216x832 landscape frame.
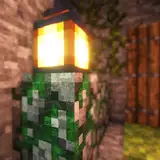
And let's use Inpainting. It's a tool that lets you redo parts of images. You can use it to redo bad hands, small details, etc, but here we'll use it to redo... the rest of the background.


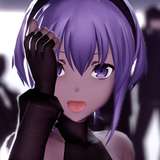
And... voila! What do you mean, there's a line?
Yeah, sure. Inpainting is not perfect, and either you have to let it lower your image quality a bit, or show artifacts on the split section. That said, as long as you're handy with an image editor, you can fix the split section in a matter of minutes. Here is the result:

Now that's an image I'm pretty happy with. If you want to go even further you could upscale it and insert back in the higher resolution image.
Most card arts in Maze of Ambition still have NovelAI metadata, so you can try to paste them in the NovelAI image editor if you want to check the prompt. You won't have any data on the vibe transfers and inpainting used, but you can use it as inspiration.