For years I have wanted to make my own figures/toys but was never sure how to approach this. I tried sculpty in the past, clay/making molds but everything seemed crude to me plus I was having issues with symmetry or fingerprints all over my molds. Sitting down and working with those materials also meant making a mess everywhere and having the material in hand but I was never really happy with the overall results. Decided to try making figures using 3D, Zbrush to be specific and finally found something that works for me. I will go over what has worked and what has not during this learning process.

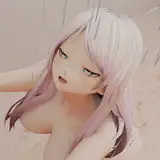
With any sculpt we need to start with the basics. With Zbrush I use a lot of spheres and shape them to the look I want. I did a typical T pose for this character as my intention was to rig it so it was easier for me to pose for future models. Will go over that section later. I consider this the sketch layer where I get everything where it should be before I start adding details.

Once I'm happy with the shapes I go in and start adding details. I kept this model pretty simple since I wanted to try and print something, anything to see how it would come out. I didn't bother to rig or pose it so just kept it as is.

I test the model in different light/shades on the program itself to see if I see any glaring issues. The model looked fine all around so decided to give it a quick tail and color it up to get an idea how the figure would look painted.


Was pretty happy with the overall look. I did end up taking it to Blender to give it a quick rig, but choose not to pose it right away. Decided to continue with the original idea of printing it with extended arms since I knew it would be hard for the printer to print those areas.

I went ahead and printed the default pose but did not give the arms enough supports and decided the tail was a bit too iffy for the first model tests. Kept the tail off and saw how badly the arms came out.

The arms would of worked if I had paid better attention to the support placements. I use Chitubox, which is a free program for resin printers. These models are printed with the 3D resin printer called Epax 3D. It has been an amazing printer and highly recommend it.
https://epax3d.com/products/epax-printer
At the time I was looking for resin printers it had received a better review than the anycubic photon which is a solid contender. But the biggest issue was the photon had wobbles on the printing plate which I wanted to avoid. Though photon has now released a much stronger printer which is definitely something to check out as they have fixed their previous wobbly bed issues.
https://www.anycubic.com/collections/anycubic-photon-3d-printers/products/anycubic-photon-s
But if you are on a budget and would like to start with a resin printer the photon series is solid even if it has little issues here and there. For the price it is hard to beat and I highly recommend it.
https://www.anycubic.com/collections/anycubic-photon-3d-printers/products/anycubic-photon-zero

For resin printing be sure to have an area you can get messy. Resin printing is a dirty process and definitely takes a bit more clean up than an FDM printer (your typical extrusion type of printer) You will need isopropyl, a UV light and a table you can get resin on (lots of gloves and paper towels). Resin is also pretty stinky so do it somewhere where you have decent ventilation and wear a mask. Some resins are more toxic than others, just read up on resin types to see which one works for you. I get all of my printing resin on Amazon.

Decided to re print/re- slice the model in ChiTuBox and add stronger supports to the arms so they would print. The new supports worked really well. I did notice that the feet supports were a bit of overkill and made the feet curl upwards once the resin had cured. Meaning the figure was not standing flat on the ground anymore. This was something I did not see happening until I printed things a few times.

The supports were a success. I was using "light" supports in ChiTuBox so they were easier to remove without scuffing the figure as much.

The figure had the supports removed and cleaned in an isopropyl bath. After the figure has been washed in this bath it is put in the UV nail bed, and I run it for about a minute on as many sides as I can rotate the figure for good measure. I rather leave it in the UV curer longer than less time and have a sticky model.
So you might be wondering what UV light works, well there are many and I highly suggest investing in a nail bed UV light as it is strong and small (usually pretty inexpensive). Since most of my figures are pretty small I did not need a giant exposed UV bulb. Though I do suggest this new 2 in one system that anycubic has just released making cleaning and UV curing a snap.
Definitely plan to invest in one of these soon

Once the figure has been bathed and UV cured it is ready for the next step which would be painting. It is an amazing feeling to see something that was digital on screen come out as an actual object you can hold in hand. I love seeing these little guys emerge from the resin ooze.


This is where I started to notice my figure was leaning backwards and the feet were not flat on the ground. I knew something was up but wasn't sure how to fix it until much later.

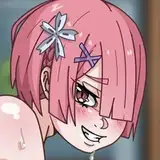
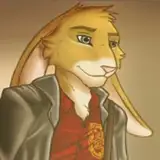
Decided to use the body from the previous model and model new arms and head for it, and this is where the new fox I am currently using came from. The best thing about 3d specially when you make parts in different layers means you can erase or hide layers and use any part you might like over and over again. No material loss since it is all in a digital format.

I wanted defined paw pads, so made them oversized so they would show up well in the model.

Modeling this character made me a bit more confident in where I wanted to take this and how I wanted my figures to look. The character was getting closer to the final look. I kept tinkering with the design for about 3 days until I was happy. Take your time to experiment, 3D is super powerful and it surprises me everyday with how much you can do with it.

Tested it with different shaders to see if I like him enough to print, so decided to finish him up by adding a tail and going from there. Adding some color to the eyes and nose just to see how he would look painted.


Tilted his body forward a bit as well to compensate for the tail weight.

Set up the supports in ChiTuBox and started the print.

But the supports were not strong enough for his arms so they failed partially through the print along with the tail. When parts fall off during the printing process which they did, please check your resin vat. I usually wear my gloves and stick my hand in the resin removing any hard cured resin bits. It is important to check your vat for any loose hard resin. If you print with hard resin in the vat you can severely damage the vat or the screen underneath. Just keep an eye on what printed and what did not.

I also noticed his tail did not print correctly and his arm completely came off once I cleaned him up. I was still pretty happy as I could see my new design in person. I had to figure out a better way to print a model that had overhanging parts a bit better.


Even though I had only had one successful print I was pretty pleased where this was going. I was seeing what I could or could not do with my printer and what I needed to alter.

In this image you can see my first, second and 3rd test. The design changes over the 3 prints.

Resin captures a lot of detail even with small figures. I was really impressed you could even see nostrils on the newest model.

Decided I wanted to do the arms and tail as separate prints to get a cleaner look but was unsure how well the socket would work for the arm. Resin does shrink a bit when cured so I decided to be extra safe with the design and made fluffy shoulder pads to potentially fix any issues that could of been caused with a misalighned joint.

Since this was my first time doing separate arms I wasn't sure if a rod was going to work. I was worried about it being to weak for the arms so went ahead and made spheres for the joints instead.


In Zbrush there is a wonderful feature called live booleans. This allows you to cut out parts of the model with whatever shape you would like. I added spheres to the tail and arms and created sockets in the rear and arms. Worked out better than I was expecting.

Went ahead and saved the tail, body and arms all in the same file so it was easier to resize in ChiTuBox. You can print these all as separate files but decided this would save time so why not.

Sent it to ChiTuBox and found out I could delete the supports on the bottom of the feet placing my model directly on the print platform. This solved any issues with the feet wanting to curl upwards. The program allows you to add or remove supports anywhere you want. The program suggests where to add supports but a lot of it seems to be trial and error.


Print was a success. Only saw some minor issues under the tail that you could easily sand out.


Once the fox was out of the isopropyl bath it went into the UV nail bed. I usually start it facing up then rotate it a few times. Doing it for about a minute a piece.


Tested the joints and everything was going well. All I needed to do was glue the parts in.


All the parts were glued. The arm fluffs allowed me to have a bit of freedom if the socket wasn't perfect. In the long run I actually really like the look so it worked out well.

All the prints together to see how the design had progressed. I was so happy I could print with consistent results now.

Printed a few and decided it was time to sand/prime and test some paints.


Primed test model for painting.

I am currently testing out Citadel paints for miniatures and extremely impressed. These can be bought on amazon or your local comic book store. Plan to test out another brand people have suggested called Vallejo paints. Spend the extra amount on good acrylics for resin figures, they are well worth it.

We are currently getting the rest of the foxes primed and ready to assemble to offer them later this month on Patreon. Will have a small batch to start with.
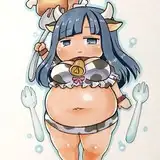
I have started on another model which is a chubby raccoon. Wanted to try a totally new look to see how the machine would handle it.

Starting with the basic shapes in Zbrush.


I knew if I wanted to print this little guy as a one piece model I would need to add supports so I did.

Sadly the supports were too weak and I did not target the palms so the print failed at the arms.

One thing I wanted to note. A lot of my models might show a bit of white here and there, the reason is I am cleaning with dirty isopropyl at the moment. Technically you should have 2 batches of it a clean and a dirty one and change it often to get the best results. Because all of my figures are going to be primed it doesn't affect me as much but something I wanted to note. Since isopropyl is very rare at the moment during the pandemic I am doing the best I can with the current materials handy. In the future I will have 2 vats of isopropyl, a dirty and clean one to soak the figures twice before curing them in UV.

I went overboard with the supports in ChiTuBox but it worked. The biggest issue was the amount of scaring it left on the model itself. So all in al if you want to print models as one part try to think about your overhangs and where you can hide supports to avoid a ton of clean up.

His little arms finally printed but you can see how many pits it left in the body and scars on the arms and hands from the supports. So I plan to split this character into parts and print again and make silicone molds. Some of these models based on the look and how much I would like to replicate them will get molds. If you look at the previous model about mold making it will be done in a smiliar manner just smaller scale. Mold making for figures will be covered in a tutorial on its own.
Hopefully this has give everyone some insight on the world of making figures using 3D and resin printers.
If you have any questions don't hesitate to ask.