最近出的流程最简单的一张图了,大致 t2i -> inpainting -> i2i + tile -> inpainting -> upscale -> i2i + tile
This one has the most simplified process of recent images: t2i -> inpainting -> i2i + tile -> inpainting -> upscale -> i2i + tile.
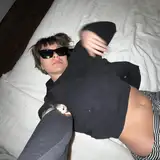
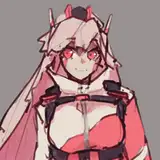
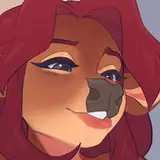
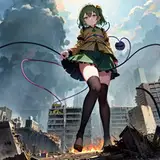
首先生成人物,这里我选择白毛红瞳的少女,提示词可以下载图片查看。
First, generate a character. Here I choose a girl with white hair and red eyes. You can download the image to see the prompts.
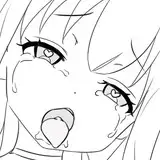
打开 PS,网上随便找一张地球的图,P 到嘴前(不用 P 的很好,只要让 AI 理解那是地球即可,靠 AI 来融合进图里)
Open Photoshop and find a random image of the Earth online. Place it in front of the character's mouth (it doesn't have to be perfectly edited, just enough for AI to understand it represents the Earth). Let AI handle the integration into the image.
接下来把上面这张图放进局部重绘里,把地球附近涂上蒙版,重绘部分选 only masked,提示词填:
Next, place the above image into the inpainting tool. Apply a mask around the vicinity of the Earth and select "only masked" for the inpainting area. Fill in the prompt with the following words:
earth \(planet\), steam, saliva, saliva trail, open mouth, steam from mouth, heavy breathing
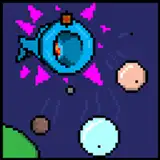
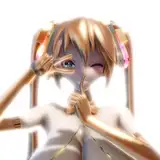
得到一张差不多的图后放进图生图放大 + 修复细节使之融合得更好,具体而言,打开 ControlNet tile 模型,分辨率调为之前的两倍即 1024 x 1536,重绘幅度在 0.5 左右,可以得到下面这张图
After obtaining a relatively good image, put it into the img2img and upscale to enhance its integration and fix details. Specifically, open the ControlNet tile model and adjust the resolution to twice the previous size, which is 1024 x 1536. Set the denoise strength to around 0.5. The resulting image is as follows:
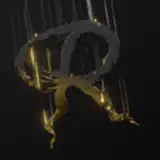
然后在放进局部重绘,略微修一下地球附近的雾气,修好后放进图生图 2 倍超分辨率到 2048 x 3072。
Next, send the image into inpainting and make minor adjustments to the haze around the Earth. Once the adjustments are complete, proceed to the img2img and perform a 2x super-resolution upscaling to 2048 x 3072 resolution.
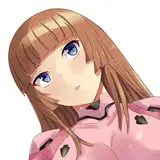
最后再放进图生图,用 ControlNet tile,重绘幅度 0.3 小幅度重修一下即得到了成品图。
Finally, send the image into img2img again, using the ControlNet tile model. Apply a denoise strength of 0.3 to make minor adjustments. This will result in the final image.