
Soaring High || A journey through the skies of speedpainting.
---
Intermediate (Art Level)
---
Materials needed
Photoshop, Procreate, Clip Studio Paint, or any other painting program that suits your preference.
---
Greetings, my lovelies. I have been working on some speed paintings in recent projects and have sort of figured out some fun ways to convey a more painterly and traditional look that I've been wanting to explore for some time.
However, I will explain below so that you can give it a try yourselves.
---
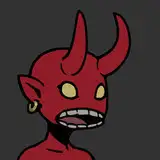
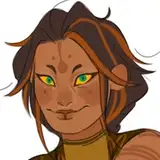
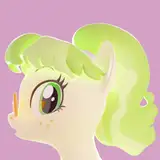
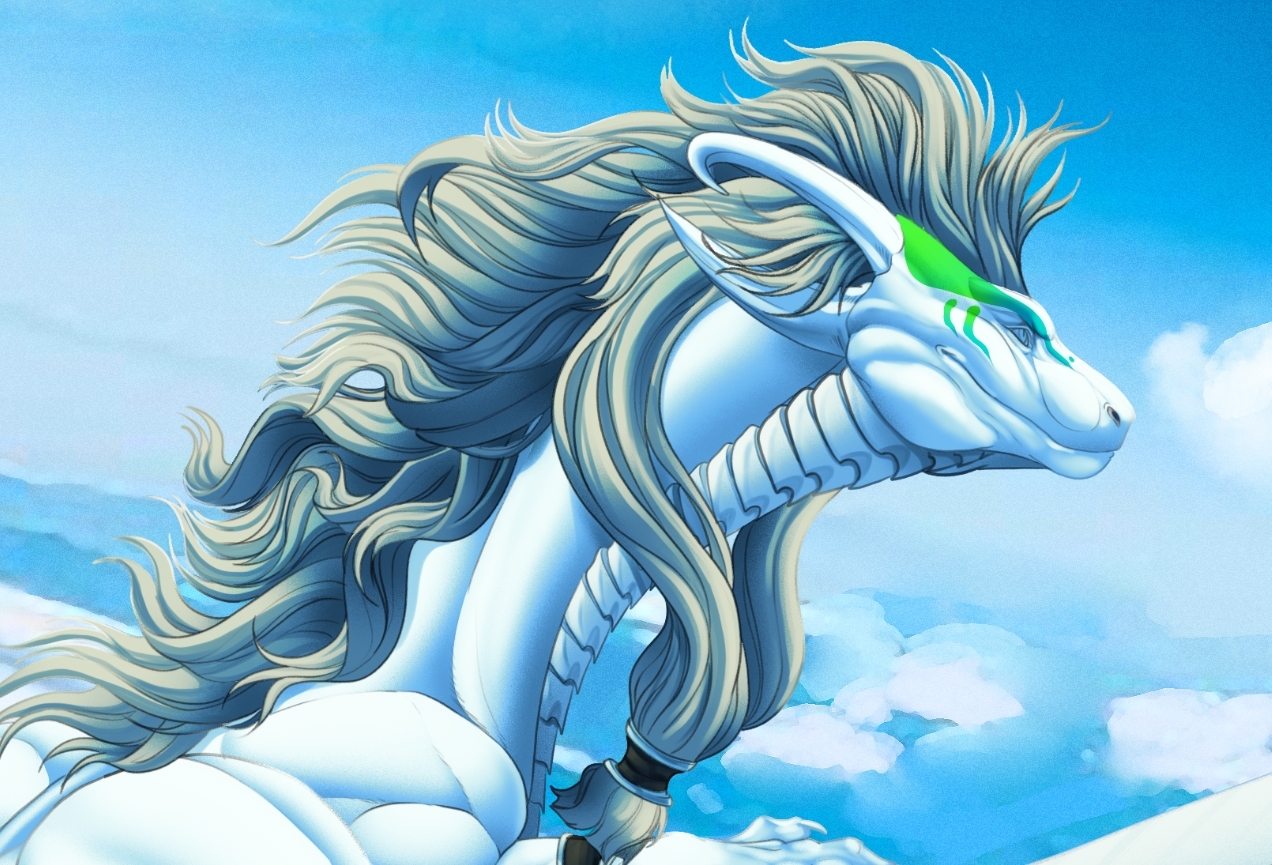
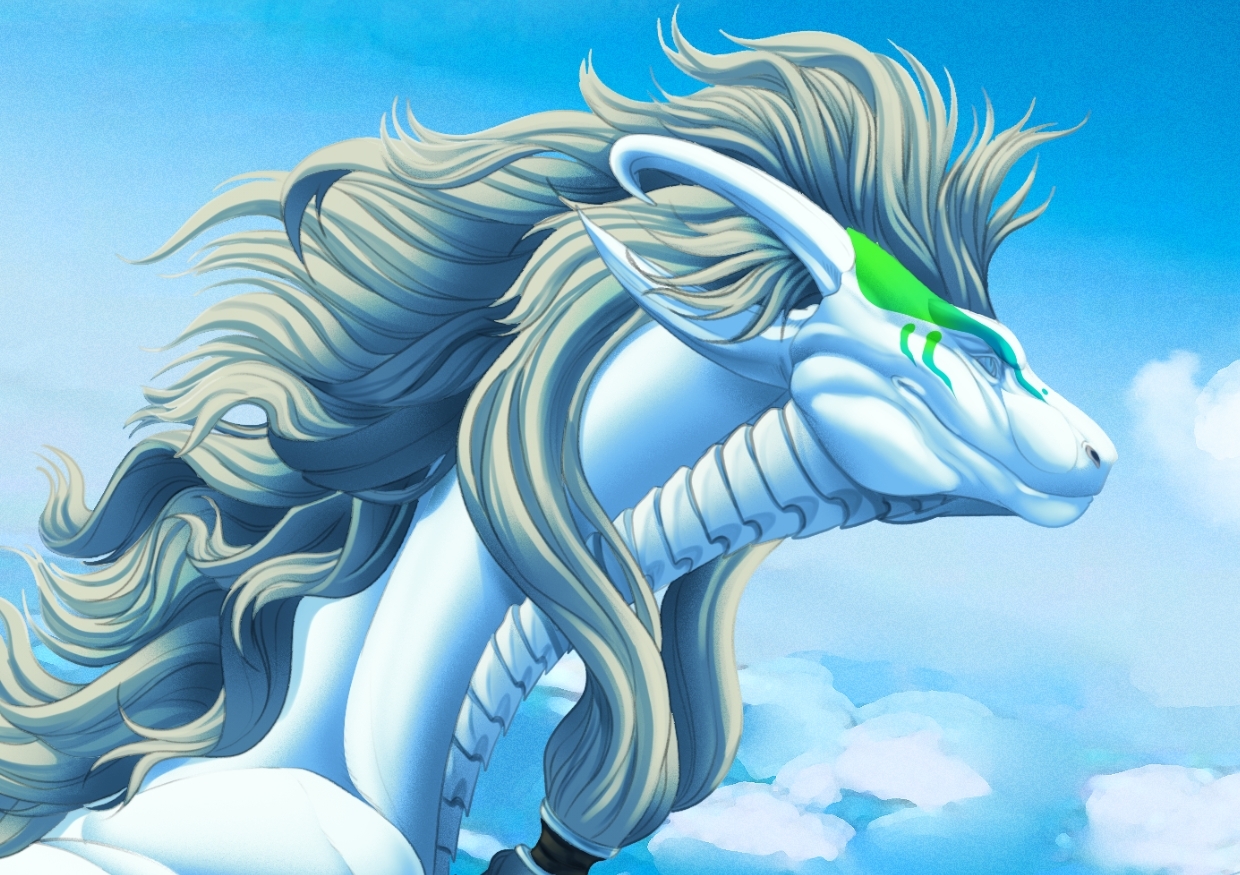
This piece was such a fun and lively piece. A festive and lively pose, utilizing a slanted perspective to enhance the character's pose. But they also convey a challenging notion through their colors, or rather, the lack of colors. Given that she is predominantly colored with a tint, not a color, which is White. White is a Tint, and Black is a shade. A tint is created by mixing a color with white, making it lighter, while a shade is made by mixing a color with black, resulting in a darker version of that color. Both terms are used in color theory to describe variations of a hue.
So what does this mean exactly? Well, it means given they are such a bright tint, all their colors will be dictated by the environment, in this case, the blue of the sky, and various hues of it based on shadows and absence of light, which would create Shades as I'm adding more grey and black.
Below are the rough sketch and base mannequin, which has a white base that allows you to see how the environment can affect the tint in the absence of light.
Between the mannequin and the rough sketch, I made some alterations to the pose, specifically the wings. I wanted to extend their reach further and emphasize the pose, so I made the wing fingers more expressive and reaching, while also lengthening them. The mane, I find, using a standard downloadable hair brush that you can find here-
● Hair brush set I used specifically.
I find that mapping out the mane in this way makes inking so much easier to convey volume and form, something I discovered in an old Dragon tutorial I came across back in 2014. This method is actually ingenious, as it helps you form the mane and flow of it without having to draw each and every strand, making inking a lot easier.
---
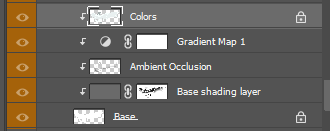
Once the sketch and refined inks were complete, the colors and block ins are next before I begin to map out how I want to shade this lovely character.
Now, it may not come as a surprise that I work from greyscale to color. So, I went with this one since it does not hold color with a darker shade of grey, around the color hex code #616161. And one more for my darkest shadows or ambient occlusion layer. So, for reiteration, my order is as follows-
● Base of pure white,
● Grey layer with a mask | as we mask out the areas where light will hit.
● Ambient occlusion layer | using controlled blacks for places where light will not hit.
● Gradient Map Layer | adds colors to all the layers underneath so you can have more vibrant and lively shadows.
● Color layer of the character on top of everything, set to multiply.
- Order in a visual perspective
This is generally the order I work in before I get into the nitty-gritty, as it helps me figure out my lighting, darkest shadows, and base colors, adjusting them as needed, especially since this character is colored mostly in a tint as opposed to a hue.
---
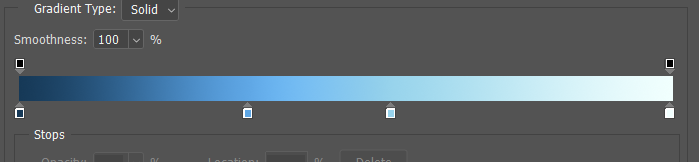
Given that the background is a much higher atmosphere, it means a lot of blue, given that the color of oxygen is, in fact, blue.
So with this in mind, I picked the colors of the gradient map as follows: Gradient map.
For the highlights, once I sort out the base idea for the color direction, I add an overlay layer above the others with a mask provided by the base shadows layer, filled with a light yellow/white from the sun.
|| Now the secret trick ||
● How do we make the lines smooth out, less harsh, or disappear? The Lineart layer, I lock it here- Layer lock It is the little lock image on this row.
● Then with your brush and its own settings I flip the Normal to Linear Dodge.
● Then, with the color picker tool, I select the colors closest to the lineart and paint over the lines, giving it this look-
● With Lineart
● Painted over Lineart
- So why is this important? This is a soft character in their looks, and I wanted to make that pop more, so I softened the lines and painted over it for this look here.
Once I was able to do that, I could paint, and generally, what I do with this is create the group from those layers, duplicate it, and then merge the second duplicate group. This allows me to keep my skeleton below while I paint on this new merged layer.
I hope you enjoyed this little insight to all this by the way, please feel free to ask or poke more. :D
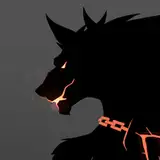
This brush set helped me with painting the rocks, the lava, the clouds.
Other brush sets I used were:
---
And so this was a little insight into this piece. I hope you all enjoy this little blurb. Please let me know if you'd like me to go more in-depth in anything in the future.
Cheers,
Noct 🐦⬛


