MLP - Celestia as a teacher (NSFW + Step by step)
Added 2018-04-27 20:44:57 +0000 UTC
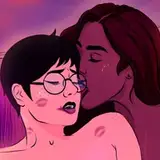
After having some difficulties with getting in Patreon, I've finally entered so I can post this: Celestia can be your personal teacher. :P
I think it could be funny to show the process of the drawing after realizing that Patreon was down for maintenance, at least in order to satisfy you. I'm not sure if that's how each artist does for their patrons, but that's how I'm gonna do it. I'm not going to sound technical because I don't think that's the purpose of this, so here we go.
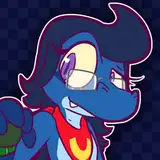
Pencil: I make the model using circles, squares, triangles and lines... basically everything I think it's necessary in order to make the character work. At first she had glasses, but I think these could hide the facial expressions, so I didn't ink them.

Flat colors + minor details: After cleaning the inked drawing, I use the bucket to make flat colours. I usually pick the colors from the screenshots of the TV show (I have a folder where I fill it with screencaps from Friendship is Magic). If I have to make colors for the skin, I usually pick the colors from a basic skin guide color I've made. Here I included minor details such as Celestia's hair, the pantyhose (which is blue at low opacity), her lips, her eyes and her blushed face.

Shadows + textures and some text: For the shadows I usually pick a very basic brush and then I toy with the opacity and the layer type. And this occasion I pick a couple of photos, I changed their layer type and I glued on the blackboard and the table. I've made this because I think that would make the drawing a little more detailed. Then I've written some text and I toyed with them. Shapes, the Photoshop eraser, the layer type...

Brightness + white from the eyes: Here the brightness is necessary because I want to recreate an afternoon for the classroom. I've used one basic brush for the brightness on Celestia's body and her suit and one special brush for her hair.

More shadows: This one was an extra hue/saturation layer to recreate more shadows. If the light has to be intense, then the shadows will have to be darker. Besides, it will work for the final composition color.

Color balance: I wanted an afternoon, so I've used a color balance layer to recreate that.
Curves + dialogue = Final result: I've used some curve to make the light and the shadows more noticeable. I didn't want to do it for all the drawing, just in the left side (light) and in the right and bottom side (shadows). Then I write the dialogue, I make the bubble speech and that's it.
I usually let it go for some minutes or hours. Then, I go back so I can check it if I've made a mistake. This is not the first time that happened. Once I've drawn Apple Bloom without her cutie mark at a point where she's supposed to have it. xD
Aaand I think that's all for today. Thanks for your support and I appreciate your patience. I didn't know how to get in the website. If you like this step by step list instead of the other way I've made, I could go on doing this for every drawing if you want.
In a half hour I'll post another sketch. It will be a Twilestia drawing. See you soon!
Love,
RT