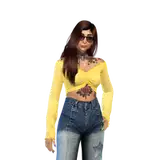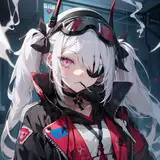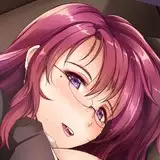
The process video I did for This Piece!
I completely forgot to start recording when I was at the beginning of this one, but I at least managed to capture the process from the second panel onward. :)
Some notable deets of the process if you're curious or wanna know!
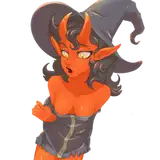
-When I do comic panels or just panels in general, in which the character is suggested to move, I typically get into an animation mindset. I basically go about the drawing as if I'm gonna be animating them, even if it's between two separate frames, and this helps me visualize how the character would emote and move between emotion or sentences depending on what they're doing without it being a huge jump in action. It also helps me keep at least some semblance of consistency when the character is turning their head! That's why you'll see me "flipping" between the drawings of Mal, to make sure their were at least kinda consistent with one another.
-A lot of the time, when I draw I typically start with the eyes first. I alternate between this and doing the whole "circle for the head" thing, but yeah, typically I start with the eyes and work outward. This is largely because the eyes and nose help as "anchor" points for the character's face, especially when I'm working so close to them and have to keep consistency in mind. When I know where the eyes and nose are going, the rest is usually a lot more simplistic to figure out.
-Ya'll have told me that my sketch work apparently look more like fully fleshed lines than they do actual sketches. If anything, this is largely because I only put deliberate detailing to important aspects of the sketch. This particular piece is, in my view, "sketchy", but it works as a finished piece because there's clarity where it's needed. The biggest spot that needs clarity is the character's face. If I spend any length of time focusing on something, it's usually that. Anything that needs some refining is usually just erased in some places to make it look a tiny bit cleaner, or to carve out details that I initially didn't add in the lines. Think of drawing like sculpting! Adding and taking away to give form to your vision.
-Speaking of sculpting, random tip: try visualizing what you're drawing in a 3D space! This is largely how I'm able to picture how to position the characters and their gestures, such as how I went about drawing Mal's hand. Actually making the pose or gesture before you draw it really helps too, especially if you aren't using a still reference. Just use yourself as a live one! I do it all the time for hands and expressions. :)
-Work smarter not harder! You'll see me copy/paste a few times with pieces of the drawing I did before, particularly with Mal. This is because if I really don't have to redraw something, I won't. Saves time and works like a charm! I at most do minor adjustments to better fit the paste with the new drawing.
-When I work I try to keep myself loosey-goosey. It not only gives your lines a little more oomph in my opinion, it also helps in reducing wrist injury. This is actually why my wrist has been faring much better recently! I have a chronic injury that'll flair if I work for too long, but drawing with the entirety of my arm (or at the very least from my elbow downward) helps reduce the likelihood of that happening and helps it heal properly. It's hard to train yourself to use this posture if you've taken to drawing exclusively with your wrist but I highly advise you give it a shot; the results are well worth it!
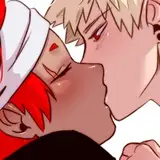
-In terms of composition, it's always a good idea to think of it when you work, even when it's simple stuff! For this one's second panel in particular I did put some thought into how I should lead the viewer's eye, and it ended up in a zig-zag sort of pattern: the viewer will likely look at Mal first given she's so front and center, so her hands and the direction the point of her speech-bubble all generally leads to Kaela. Kaela's direction of facing, where she's looking, and the point of her speech bubble leads right back to Mal. The cycle repeats. That's a relatively important aspect of composition: leading the viewer's eye. Know what you want your viewer to pay particular attention to and use that to your advantage!
-I don't have much to say for coloring this go round, but if you're curious: I always use two tones for skintone. One as the base skin color, the other as the skin's "flush". This is what I use to try and instill a bit of life into my human characters, as if they were alive and had blood running through them. The flush gives that extra bit of liveliness of the character, and they aren't randomly selected: I always go for where full-on blushing actually happens, or where body temperature is usually higher even at rest. These spaces are the cheeks (plus the bridge of the nose), the ears, the shoulders, knuckles, the chest, and the groin. The only real spaces that have higher temp is the face, chest, and groin, but the additional locations I put the healthy flush helps anyway I think. :)
---
And that's all I can think to say! Please feel more than free to ask for elaboration or questions in general! As a side note, this type of content will be restricted to the Apple Tier and upward! This one was made available to everyone as a free preview :)
More to come soon! ^.^