![[FREE WORKFLOW] Basic FLUX+ ControlNet Workflow](https://img5.xaiju.com/storage/7/pn/po/d38796-019e8569-da59-7829-845c-dcc00afa1fca.png)

Many of you have asked about the Flux Workflow I use. Well, over the last few months, I've gradually built one that grew larger and larger. I've now streamlined it to make it easy to install while still offering all the essentials:
Lora support (I always use this workflow to test character Loras I train with my Consistent Character Creator), ControlNet for full control over your compositions and character poses, Demon Detailer for insane fidelity and upscaling for high resolutions.
I've also added a post-processing group that lets you apply film grain, chromatic aberration, or even compression to make your images look like they were shot on a camera or a phone.

This workflow is supposed to be a good foundation to build your own stuff on top of. Test out different Lora combinations, sampler settings and prompts to make it your own.
❗Very soon I will show you how I used this workflow as a foundation to build a super realistic image generation workflow!
But for now: Feel free to play around with this one. You can find all the models you'll need below and in the workflow. I have also written a little guide on how to use this one and get started! 👇
Download the .json file and drag and drop it into your ComfyUI window. Install the missing custom nodes via the manager and restart ComfyUI.
1. FLUX CHECKPOINT: flux1-dev-fp8
📁 ComfyUI_windows_portable\ComfyUI\models\checkpoints
Search for "Flux" in the model manager and install "flux1-dev-fp8". Of course you can switch out this node for a GGUF model loader or use another FLUX DEV checkpoint.
2. CONTROL NET: InstantX/FLUX.1-dev Controlnet (Union)
📁 Open the ComfyUI Manager > Model Manager > search for “union” > install
3. UPSCALE MODEL: 4x-ClearRealityV1 https://openmodeldb.info/models/4x-NomosUniDAT-otf*
📁 \ComfyUI_windows_portable\ComfyUI\models\upscale_models
* You can also use other upscale models like 4xUltraSharp which you can download via the ComfyUI Model Manager.
4. LORAS
I use this workflow with my Character Lora that I trained on images generated using my consistent character creator at full strength. You can also add additional style loras.
Prompt
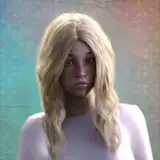
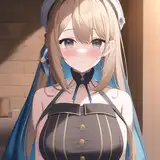
After you downloaded and loaded all the models it is time to create the prompt. Be as detailed and descriptive as possible - Flux really likes that. Name the style, lighting, composition, action, look and feel of your image.
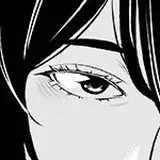
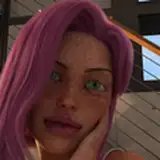
photography of a woman called a1mber standing in an italian village. she is wearing a grey turtleneck sweater, brunette hair, she is standing on an old bridge with views of a landscape in tuscany, candid photography, she is smiling. amateur photography with motion blur, iphone photo, hard sunlight, low resolution candid photo taken on a phone, grainy, the old rustic buildings are decorated in great detail, hard evening sunlight reflects from her skin
a1mber is the trigger word for my character lora!
ControlNet
A ControlNet is a tool that lets you guide AI image generation by using reference images or sketches to control specific aspects like pose, composition, or layout while still maintaining creative freedom in other elements.
Using it with this workflow is completely optional. Activate it using the fast bypasser in the beginning of the workflow.
I recommend using openpose or sketches as inputs. You can use this website to pose your character and download the Openpose controlnet image. Works really great most of the time, but don’t expect it to work every time. Sometimes you need to try out different seeds or increase the strength parameter in the “Apply Advanced ControlNet” node.
Sampler
1. Start by setting your scene dimensions here.
2. The Detail Daemon Sampler is an incredibly powerful tool for adding detail to your generated images. I recommend watching some tutorials specifically for this feature, but definitely experiment with the detail_amount setting. I typically keep it between 0.10-0.60, as higher values can sometimes break the images, but see what works best for your projects!
3. The batch_size controls how many images you want to generate at once.
4. The noise seed determines the base variation of your image. Change it for completely different results, or set it to "randomize" to get a new image each time you run the workflow.
5. These basic sampler settings work well for most images I've created, but feel free to experiment with different sampler and scheduler combinations.
6. This value should always be greater than 1. This specific setting has worked great for me, but don't hesitate to try different values.
7. This will save a low-resolution preview of your image. If you don't need this, you can deactivate the node using CTRL+B.
Upscale
I'm using the SDUltimate upscaler with Flux. This tool breaks down images into smaller tiles and upscales them sequentially, which creates more detail while also being easier on your computer's processing power.
I recommend using my settings as a starting point, but definitely experiment to find what works best for you. The most crucial setting is the denoise value, which controls how much the upscaler can modify your image. A value of 0.30 works well for most situations - it gives the sampler enough freedom to enhance the image while ensuring it maintains consistency with the original
Post Processing
This group simulates typical artifacts of cell phone photography. Play with the values or deactivate individual parts or the entire group if this is not desired.
Chromatic aberration is the visual distortion that occurs when a lens fails to focus all colors to the same point, causing colored fringes along boundaries between dark and light areas of an image.
Image sharpening in phone photography is the process of enhancing edge contrast to make details appear more defined and crisp to compensate for limitations in small camera sensors.
Bloom in phone photography is the halo-like glow that appears around bright light sources. Smudges on a phone lens can create or exaggerate bloom effects because fingerprints, oils, or dirt particles scatter incoming light in unpredictable directions.
Film grain in phone photography is the deliberate addition of noise or texture to digital images to simulate the organic, slightly imperfect look of traditional film photographs.
Image compression in phone photography is the process of reducing file sizes by selectively discarding visual data, often resulting in artifacts like blocky textures or loss of fine
All these effects can make the image look more natural:

M x
2025-11-01 19:45:07 +0000 UTCeduardo
2025-06-14 20:04:09 +0000 UTCmartin
2025-05-11 00:40:21 +0000 UTCJustin Aharoni
2025-03-20 14:47:34 +0000 UTCMick Mahler
2025-03-20 12:56:59 +0000 UTCg balaji
2025-03-20 09:49:31 +0000 UTCLaurent Clermont
2025-03-20 09:45:56 +0000 UTCChristoph Struber
2025-03-20 09:30:18 +0000 UTCJokeAlley
2025-03-19 21:07:15 +0000 UTCMick Mahler
2025-03-19 17:45:05 +0000 UTCPedro Valerio Lopez
2025-03-19 17:39:50 +0000 UTCZzZzz 🐑 💤
2025-03-19 16:57:23 +0000 UTCAirborneSapper708 RoughTerrain12B
2025-03-19 16:49:47 +0000 UTC