This time progress is on the shading of the skin and hair.
First, I will draw the texture of the skin area where the UV boundary was visible last time. The unnatural boundary areas from last week's progress are completely gone. I will also draw in the shadows caused by the subtle unevenness of the body and the wrinkles in the armpits.
Fig.1.1
The wrinkles and shadows on the back and buttocks will be drawn in the same way.
Fig.1.2
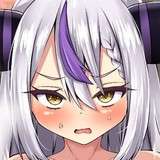
Next, the shading of the face is adjusted.
At the moment, the face has realistic shading, which is not appropriate for a 3D animated character.
Fig.2.1
The shading on the face is now reduced.
Fig.2.2
Next, I add color to the arms.
The character is gradually turning bright red from the elbow onward, but even if I draw in the texture, the skin shading is still applied and the skin color is added to the bright red color.
Fig.3.1
The shader node is set up and adjusted so that the skin shading is gradually reduced as the red color gradually becomes redder. However, it would be unnatural if no skin shading is applied to the bright red areas, so I adjust the shading so that only a small amount of shading is applied.
Fig.3.2
Next, I will shade the hair.
I was not happy with the previous shading of the hair without texture, so I first prepare the hair for UV development so that I can draw a texture for the hair. By adding a seam to the hair mesh, I can pseudo-develop the three-dimensional hair into a flat surface, making it easier to reflect the texture of the flat surface on the three-dimensional hair. First, a seam is placed at the boundary between the front and back surfaces of all the hair. The red line in the image is the seam.
Fig.4
After that, UV expansion is performed and all hair meshes are pseudo-developed on a flat surface as shown in the image. At first glance, it looks as if all the hairs are developed together without any gaps, but in this state, the position and order of the hairs are scattered, and it is difficult to tell which hair corresponds to which hair. Therefore, I will rearrange all of these hairs in a way that is easy to understand.
Fig.5
I have rearranged them. By the way, this UV is only for the hair in the back, and the hair in the back has two layers, upper and lower, to increase the volume. to explain the position of the UV, the top of each island of the hair eye is the root of the hair, the bottom is the tip of the hair, the top 1/4 of the image is the top layer of the hair, the second from the top The second layer from the top is the back side of the hair on the top layer, the second layer from the bottom is the front side of the hair on the bottom layer, and the bottom layer is the mesh on the back side of the hair on the bottom layer. The more it is placed on the left, the more it becomes hair on the left.
Fig.6
Finally, I draw the texture of the hair.
I will look at the side hair, which was created by dividing the hair structure into front, side and back.
Below is the side hair.
Fig.7.1
As before, I will expand the UVs and arrange them neatly.
Fig.7.2
Draw a texture to match this UV using a drawing software.
Fig.7
After drawing, go back to blender and apply the texture to the hair. If you compare the front hair and the side hair, you will see that only the side hair has the typical texture of hair. That's all for this week. Next week, I will start applying textures to the bangs and back of the hair.
Fig.8