I started working with the glossy look a little while back but had some issues with the plastic creating bubbles against the printed surface. I took a break from the idea and went back to it again today and fixed the issue I was having before. So this is my step by step process on making glossy eyes like these.


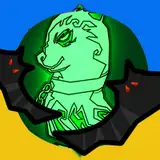
This fox is in need of eyes and since I am testing a few things on him I decided he would be a great candidate for this type of eyes. I drew up the eye, pupil and iris to make sure I had the exact measurements I wanted on paper.

I then put the paper eye on my desk and took a photo of it with my ipad. This way I can trace over the eye to have the exact look like the one I had drawn out on paper. I measure the eye and create a canvas in procate that fits my dimensions. I color up the eye exactly how I want it and get it ready to print.

I am using a photo printer to print these and made sure my file was higher res to avoid pixilation. I am printing on a matte paper but you can print on any photo paper and any printer you have. I printed these on a Canon PIXMA PRO 200.

I printed a whole page of eyes just in case I had messed up any of them and that way I have extras to test things on. Once the ink has dried I cut out the eyes in the shape I want. Since I want to see out of the pupil I cut out the pupil in the print itself. Be sure to use small sharp scissors and try to be as clean as you can with this. You can also use an exacto blade for this step.

You can see the eye above has had the pupil cut out while the one below has not. It does not matter how you cut the outside edge of the eye as it will be covered. The pupil area should be the cleanest cut.

These eyes will require a couple of materials to create this look. The process isn't very complicated but it is time consuming. Give yourself a couple of hours to do this but in the end you will be very happy with the results.

I decided to recycle some plastic I had in hand. I had bought some face gear over a year ago to use the actual head gear but the shields were put aside. I had not come up with a good way to use them until now. So these are literally face shields that were never used, you can get replacement face shields like this here:

I loosely created a pattern that fit over the eye and used that as a template to cut out 4 pieces. One for the front of the eye and one for the back. You want these eyes completely sealed so they do not fog in an area where others can see. The plastic is flexible enough to be cut with scissors. Take in mind the visor has a protective layer on the front and back which is why the visors appear milky. Once the protection is removed the visor is crystal clear.

You can see the pattern piece has both pieces of protective layer removed while the others do not.

To prepare the eyes we want to paint/marker in the edges where the pupil was cut. It helps create the illusion that the pupil is still solid once the mesh is added. I do this with a deco paint pen.

Uchida 200-C-1 Marvy Deco Color Fine Point Paint Marker, Black
Just be careful when painting this area. Most paint pens will bleed out a little bit which you can see from the back so avoid adding too much paint. Big reason I printed a few eyes was for the simple reason I had already messed up a set of eyes with it bleeding too much into the sun spots. If you are lightly painting the area around the pupil cut out it should not be an issue.

The type of mesh I am using for these is not a typical mesh but really like it. I like that it is plastic, stiff and easy to cut. I got this idea from another maker named Kemono Okapi as she was using the same material.

I traced both eyes on the mesh and cut them out. I wanted the mesh to cover the entire back so the eye was overall stronger and easier for me to glue.

Now I was ready to use my rapid fuse glue (you can buy this at any craft store, hardware store and even walmart). I suggest this glue over hot glue for a lot of these parts because it literally bonds to everything and it is a lot less messy. A little goes a very long way just be careful with your skin, it bonds to everything quick. In this step I wanted to bond the plastic black mesh to the back of my paper eye cut out. The mesh would be the new pupil and this way I could see out of the eye.

Clips are your friends, get them, use them. When I work on a few things at once clips work like extra fingers holding pieces for me while they glue. I clipped the entire perimeter of the eye to help the glue bond while I worked on the next eye.

Mesh was glued and I was waiting for it to cure. I love clips.

Since I had printed a few of these eyes in a few materials I grabbed one of them and cut into the eye itself. I wanted to create a sort of gasket that would create a tiny amount of space between the plastic and the printed paper. I had mentioned having issues with my previous eyes getting bubbles because the plastic and the photo paper were touching. This "gasket" made out of foamies was going to solve this issue. It does not need to be very big but still thick enough so the front plastic and the paper did not touch.


Both foamie gaskets had been cut. Take in mind you only need one of these per eye so each of these gaskets was for the right and left eye.

I then glued the foamies onto both eyes with rapid fuse.

Since foamies are soft and can get damaged with clips I applied pressure for about 30 seconds per eye using a sketchbook. Any flat surface will do.

I needed to start adding the back and front plastic. The plastic has a protective cover on both sides, be sure to remove the inner layer of the plastic cover as we will remove the outer layer later.

I glued the plastic on the back of the eye with rapid fuse and used clips to keep it together while it cured.

Then I switched to gluing the front plastic (remove the protective inner cover before you do, outer cover we will remove later). Clipped it again and waited for it to cure.

While I was waiting for glue to cure I wanted to work on the eyelids for these eyes. The easiest way to do this was to use painters tape, one of the extra printed eyes, a marker and some scissors. This way I can see exactly the look I want. I usually cut the eyelid part out of hard black felt (I get mine at Joann's).

Once you are happy with the shape you can cut out the inner section of the eye. You want to keep the blue tape which has now created your template.


Now the eyelid template is ready to use.

I test it to see if I like the look. Now to cut the eyelid out. You can see in this photo the outer plastic protective cover on the lens is still in place which is why it looks milky.

I cut out a backing for the eye so it looks cleaner from the inside of the head. The eyelid has been cut and ready to glue.

I remove the back plastic cover to attach the felt backer.

I remove the front plastic cover to attach the eyelids.

I hot glue the back felt to the back of the eye. Be sure the shape you cut out is big enough that it does not cover the pupil so you can see out of it.

I glue the eye lid with hot glue and wait for it to cure.

Since we want to make these eyes as air tight as possible we go around the perimeter of the eye and cover it in hot glue. By doing so we are sealing the eye in from getting any humidity which could affect the eye or allow it to fog up where people could see it.

Hot glue has been added all around the perimeter.

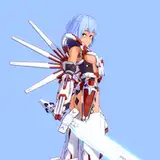
Mock color eyelid is tested to make sure it looks closer to the art I had originally drawn. Overall very happy with the result.

Both eyes are ready to be added to the foam head. With this style of eye you will need to add it to the head before you glue the fur down. This allows you to be able to integrate the eye into your foam work and create a really clean look.

The dark areas will not be as visible on the final look. They will be hidden in the foam and then later on hidden by fleece around the eye. The mock look I have drawn over is the overall final look I have in mind.
Question: Will they fog? The answer is they can but no one but the wearer can see that. Since the eyes are sealed it may fog up a bit on the inside which can be avoided by wiping a bit of anti fog gel inside the lens before suiting. This head in particular will not have a fan but others in the future with this look and built on a 3d printed base will have the option of a fan. Overall this is a look I have been wanting to do for a long time but was unsure which would be the best way to approach it. When I started about a month ago and had the bubbles appear I was pretty bummed, so put the project on the side then picked it up again this weekend. I would consider this a hybrid kemono eye. Not quite as big as theirs and not as deep as theirs either. But it still has that shiny look and nice vibrant colors for the eye itself.
Question: How is the vision? Very clear, easy to see out of.
Hopefully this tutorial will help de-mystify a few things when making glossy eyes. I plan to do another set for another head with a domed outer eye which will have a totally different look.
NazFX
2021-06-07 10:24:21 +0000 UTC